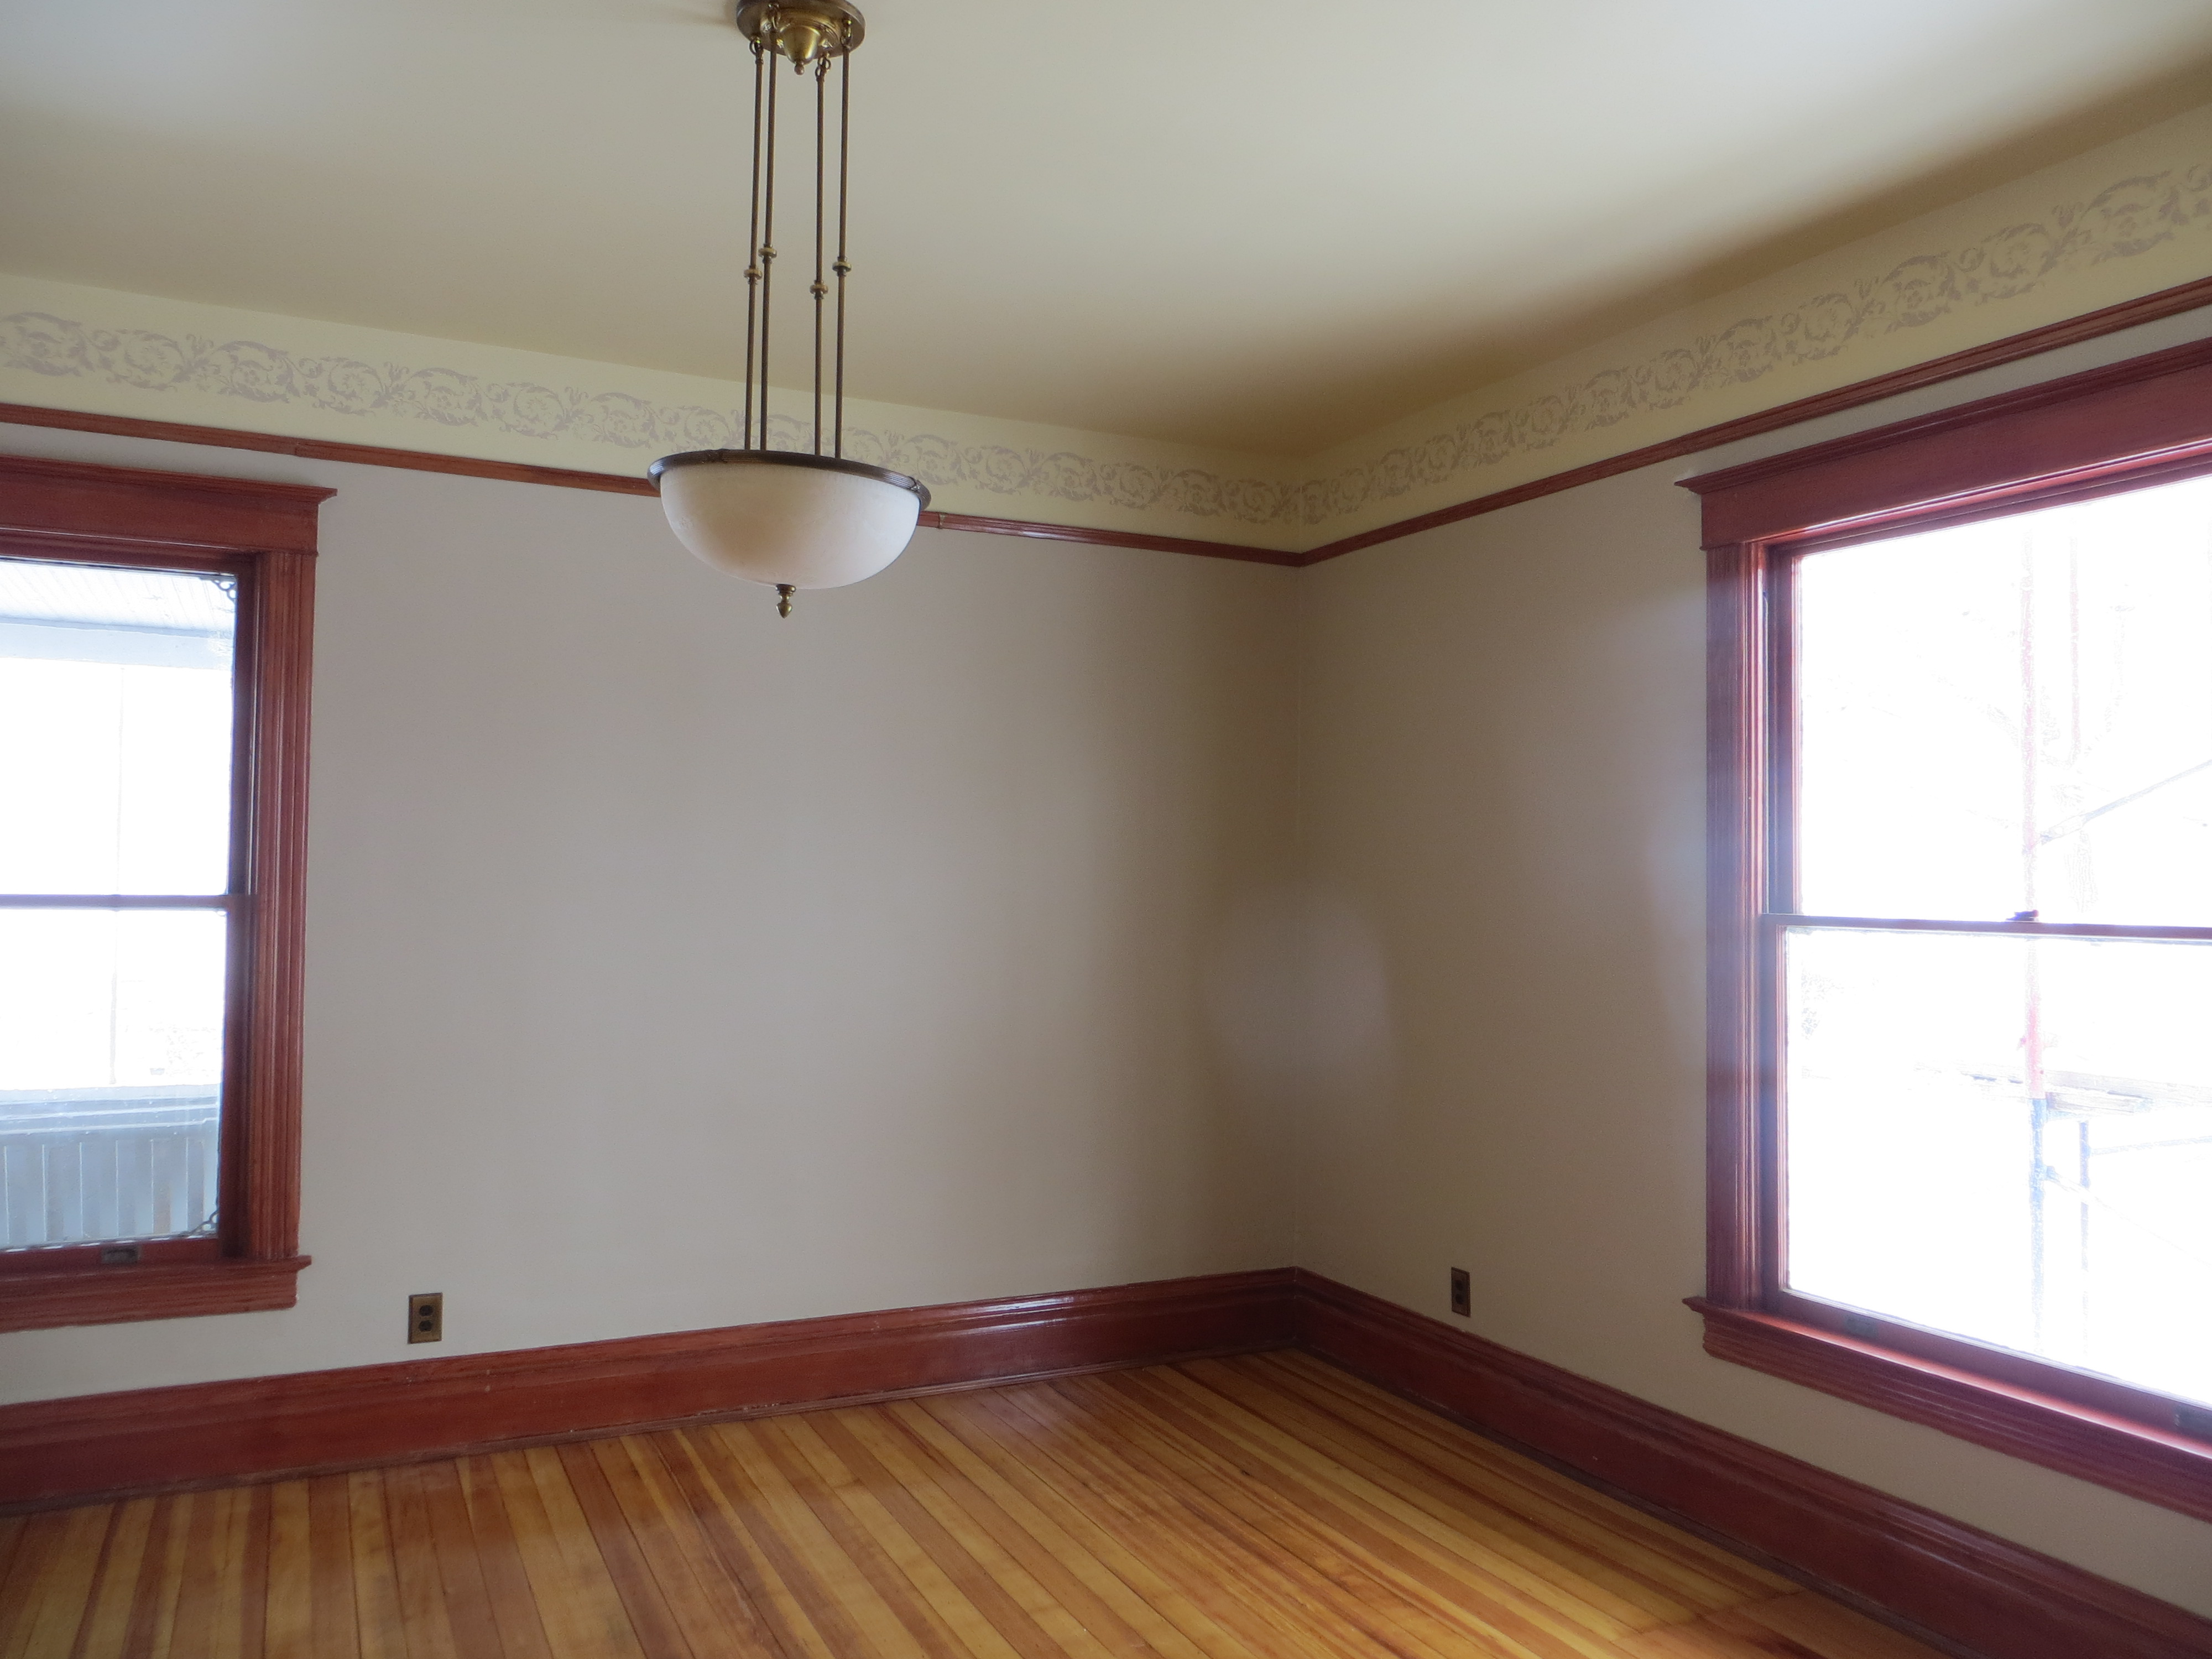
We’re not sure what to call the front room of this house. We initially thought it would be the “music room” where we would have the piano and the kids could play their instruments. Then, we thought maybe it would be a “parlor” because it would be a great room to have guests and visit. Then, we thought it would become our “living room” where the TV would be and where we would hang out most of the time. After doing all this work, we don’t think a TV would look right in this room, so we’re back to thinking it will be the “parlor”. Until then, it’s the front room.
When we first bought the house, we did a partial restoration of this room. Basically, we removed the wallpaper (that was coated with drywall texture and paint) and painted the walls. This made it a room we could use, but we knew it wasn’t done. This winter, we decided to restore the dining room and since those two rooms are connected, it just made sense to finish this room off.
Here is what the room looked like when we bought the house:
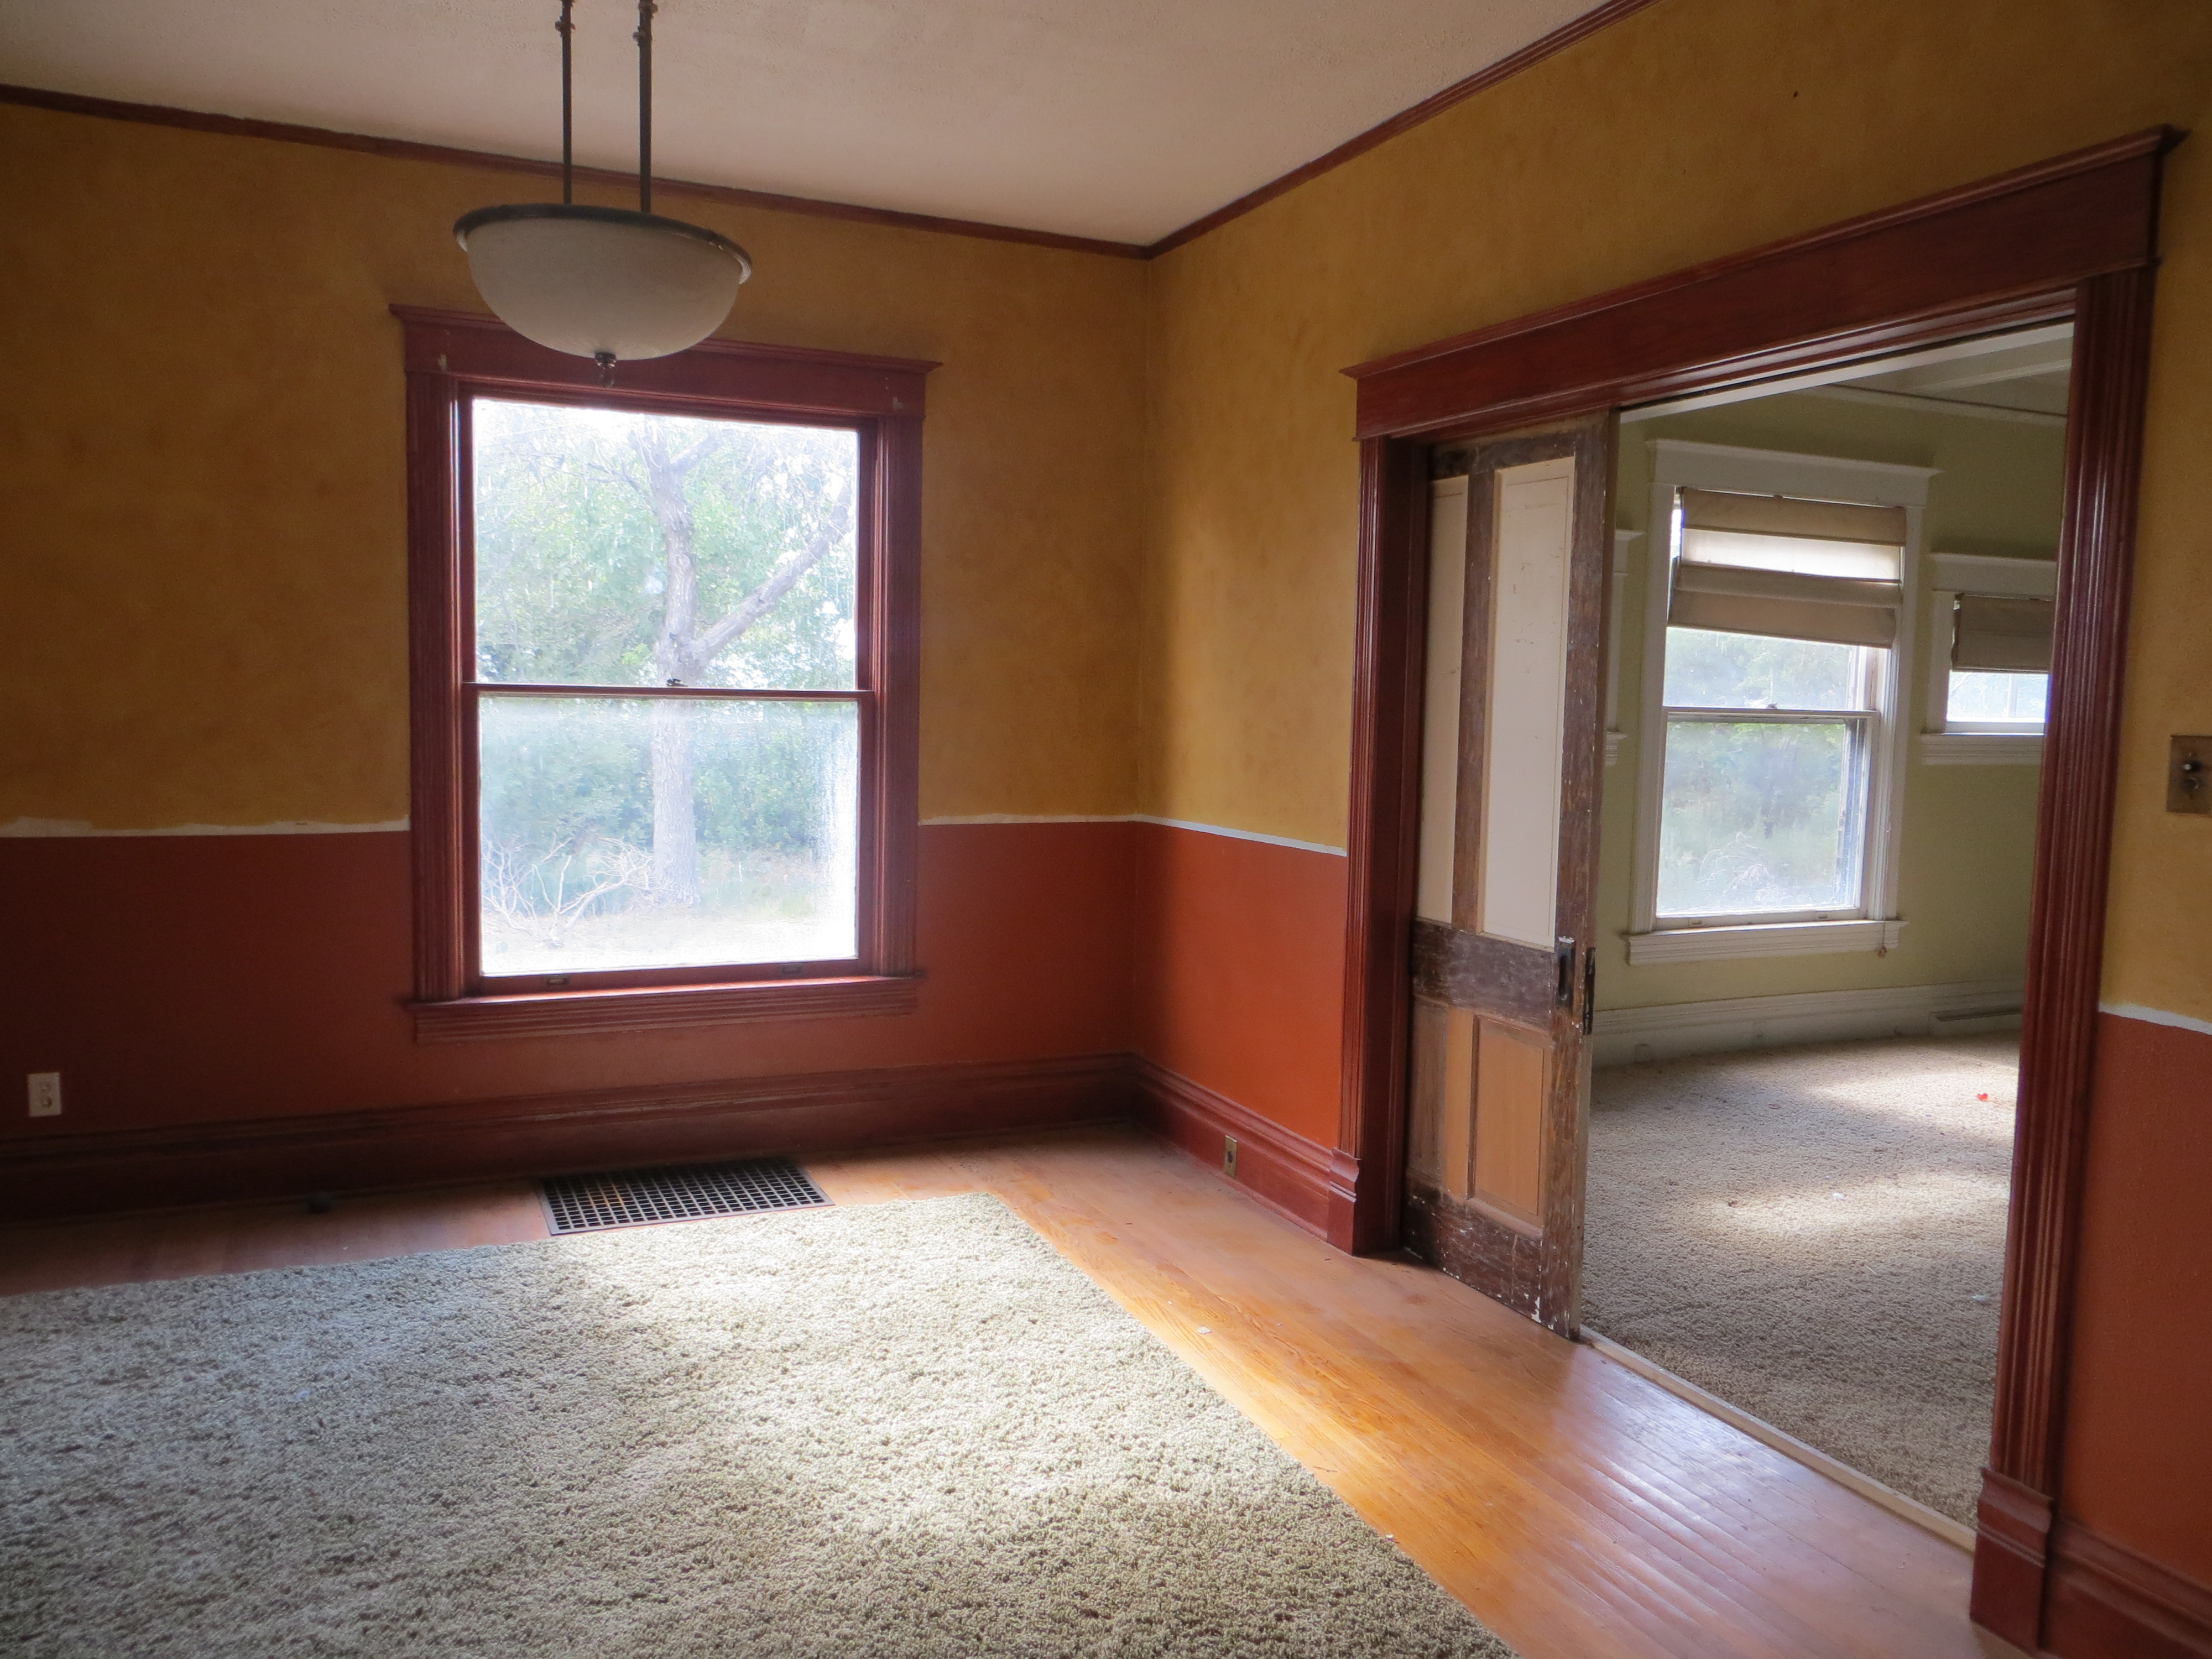
Front “music room” before. View towards dining room
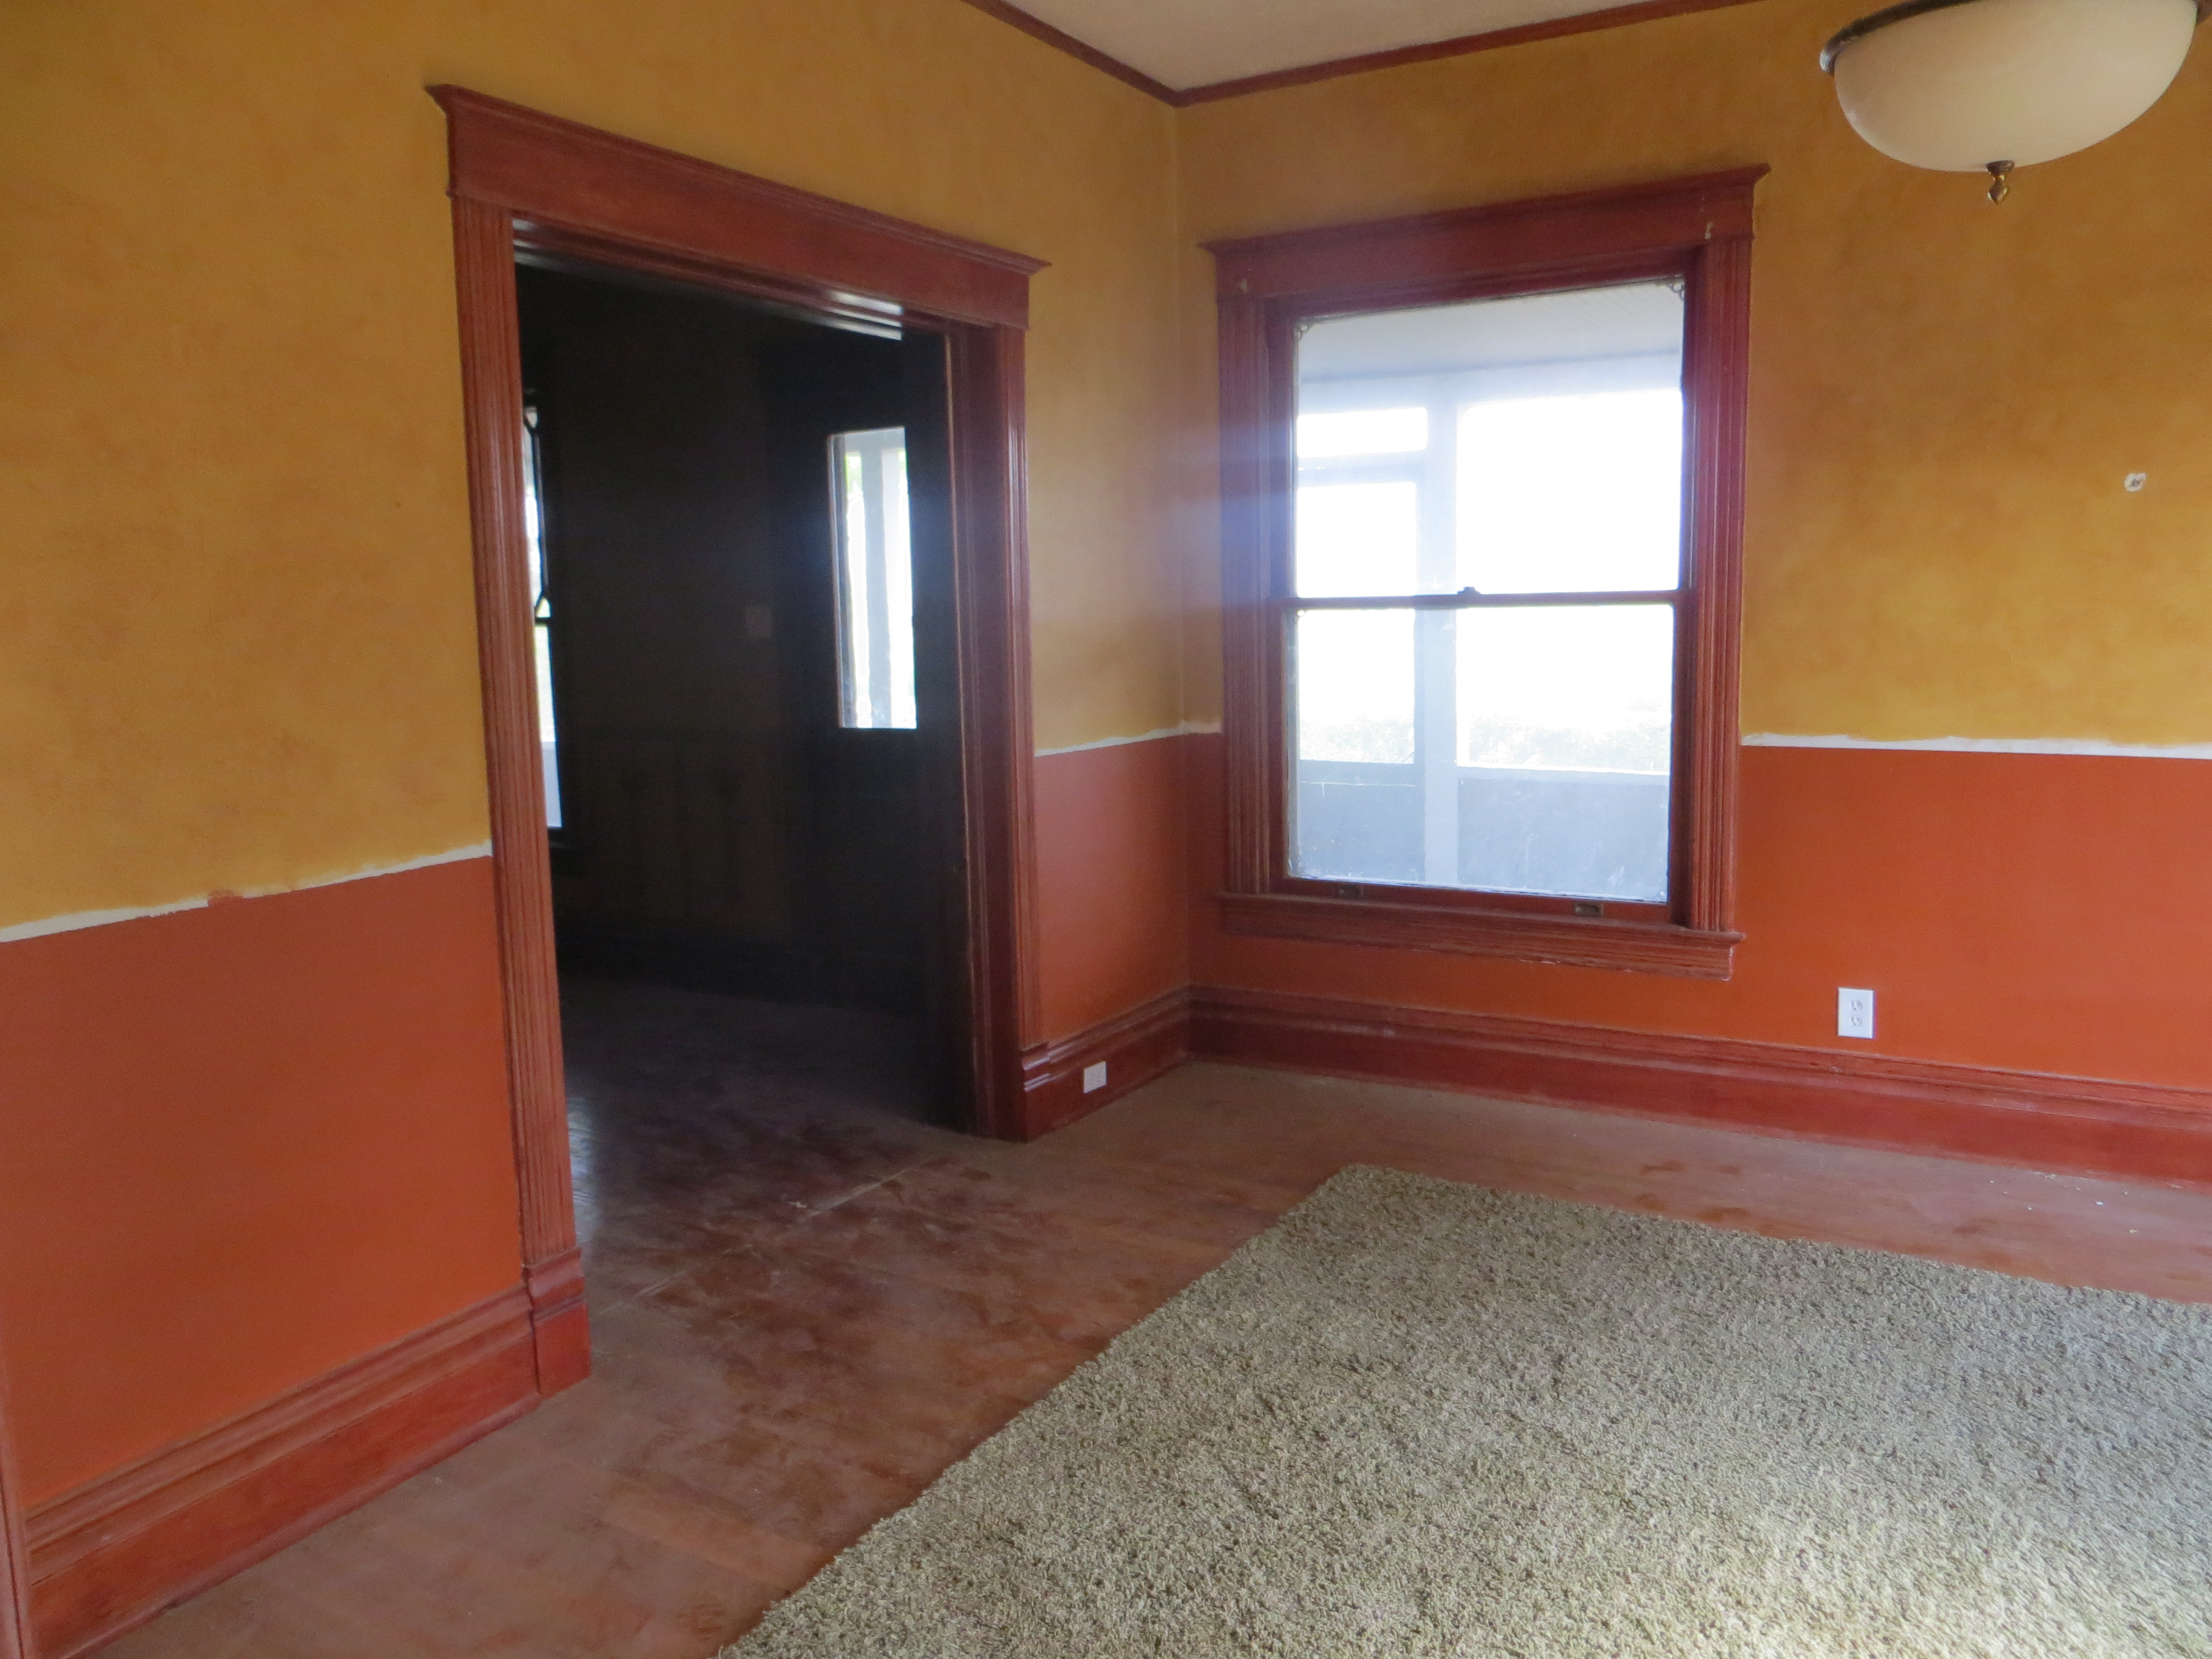
Front “Music Room” before
At some point, someone stripped the paint off the woodwork in this room. While it was nice to have unpainted woodwork, they stained the woodwork after stripping the paint. The stain they chose was a cherry color and was very tough to match. Everything we did in this room, from paint colors to decor had to go with this cherry stain. That, and they did not finish stripping the pocket doors (you can see this in the picture above), so if we stripped those doors, we would have to match the stain color.
This unpainted woodwork became quite an issue. One of the big no-no’s of restoration is…..do not paint unpainted woodwork. So, here we have unpainted woodwork, but we don’t like the color of the stain. Also, we don’t want to put the work into stripping the paint off the pocket doors just to cover them in stain that we don’t like. Dilemma….. Fortunately, I actually liked how the painted doors looked with the stained wood, so we ended up repainting the doors.
One great thing about this room is that it is the only room left with the original light fixture. All of the original fixtures were downstairs (including at least one Tiffany light) in 1996 when the longest resident sold the house. The next owner took them out and sold them except for the one in this room. As bummed out as we are to learn about the removal of the original lights, we are thankful to still have this one.
Here is what we did in this room:
- Removed wallpaper (coated with drywall texture and paint)
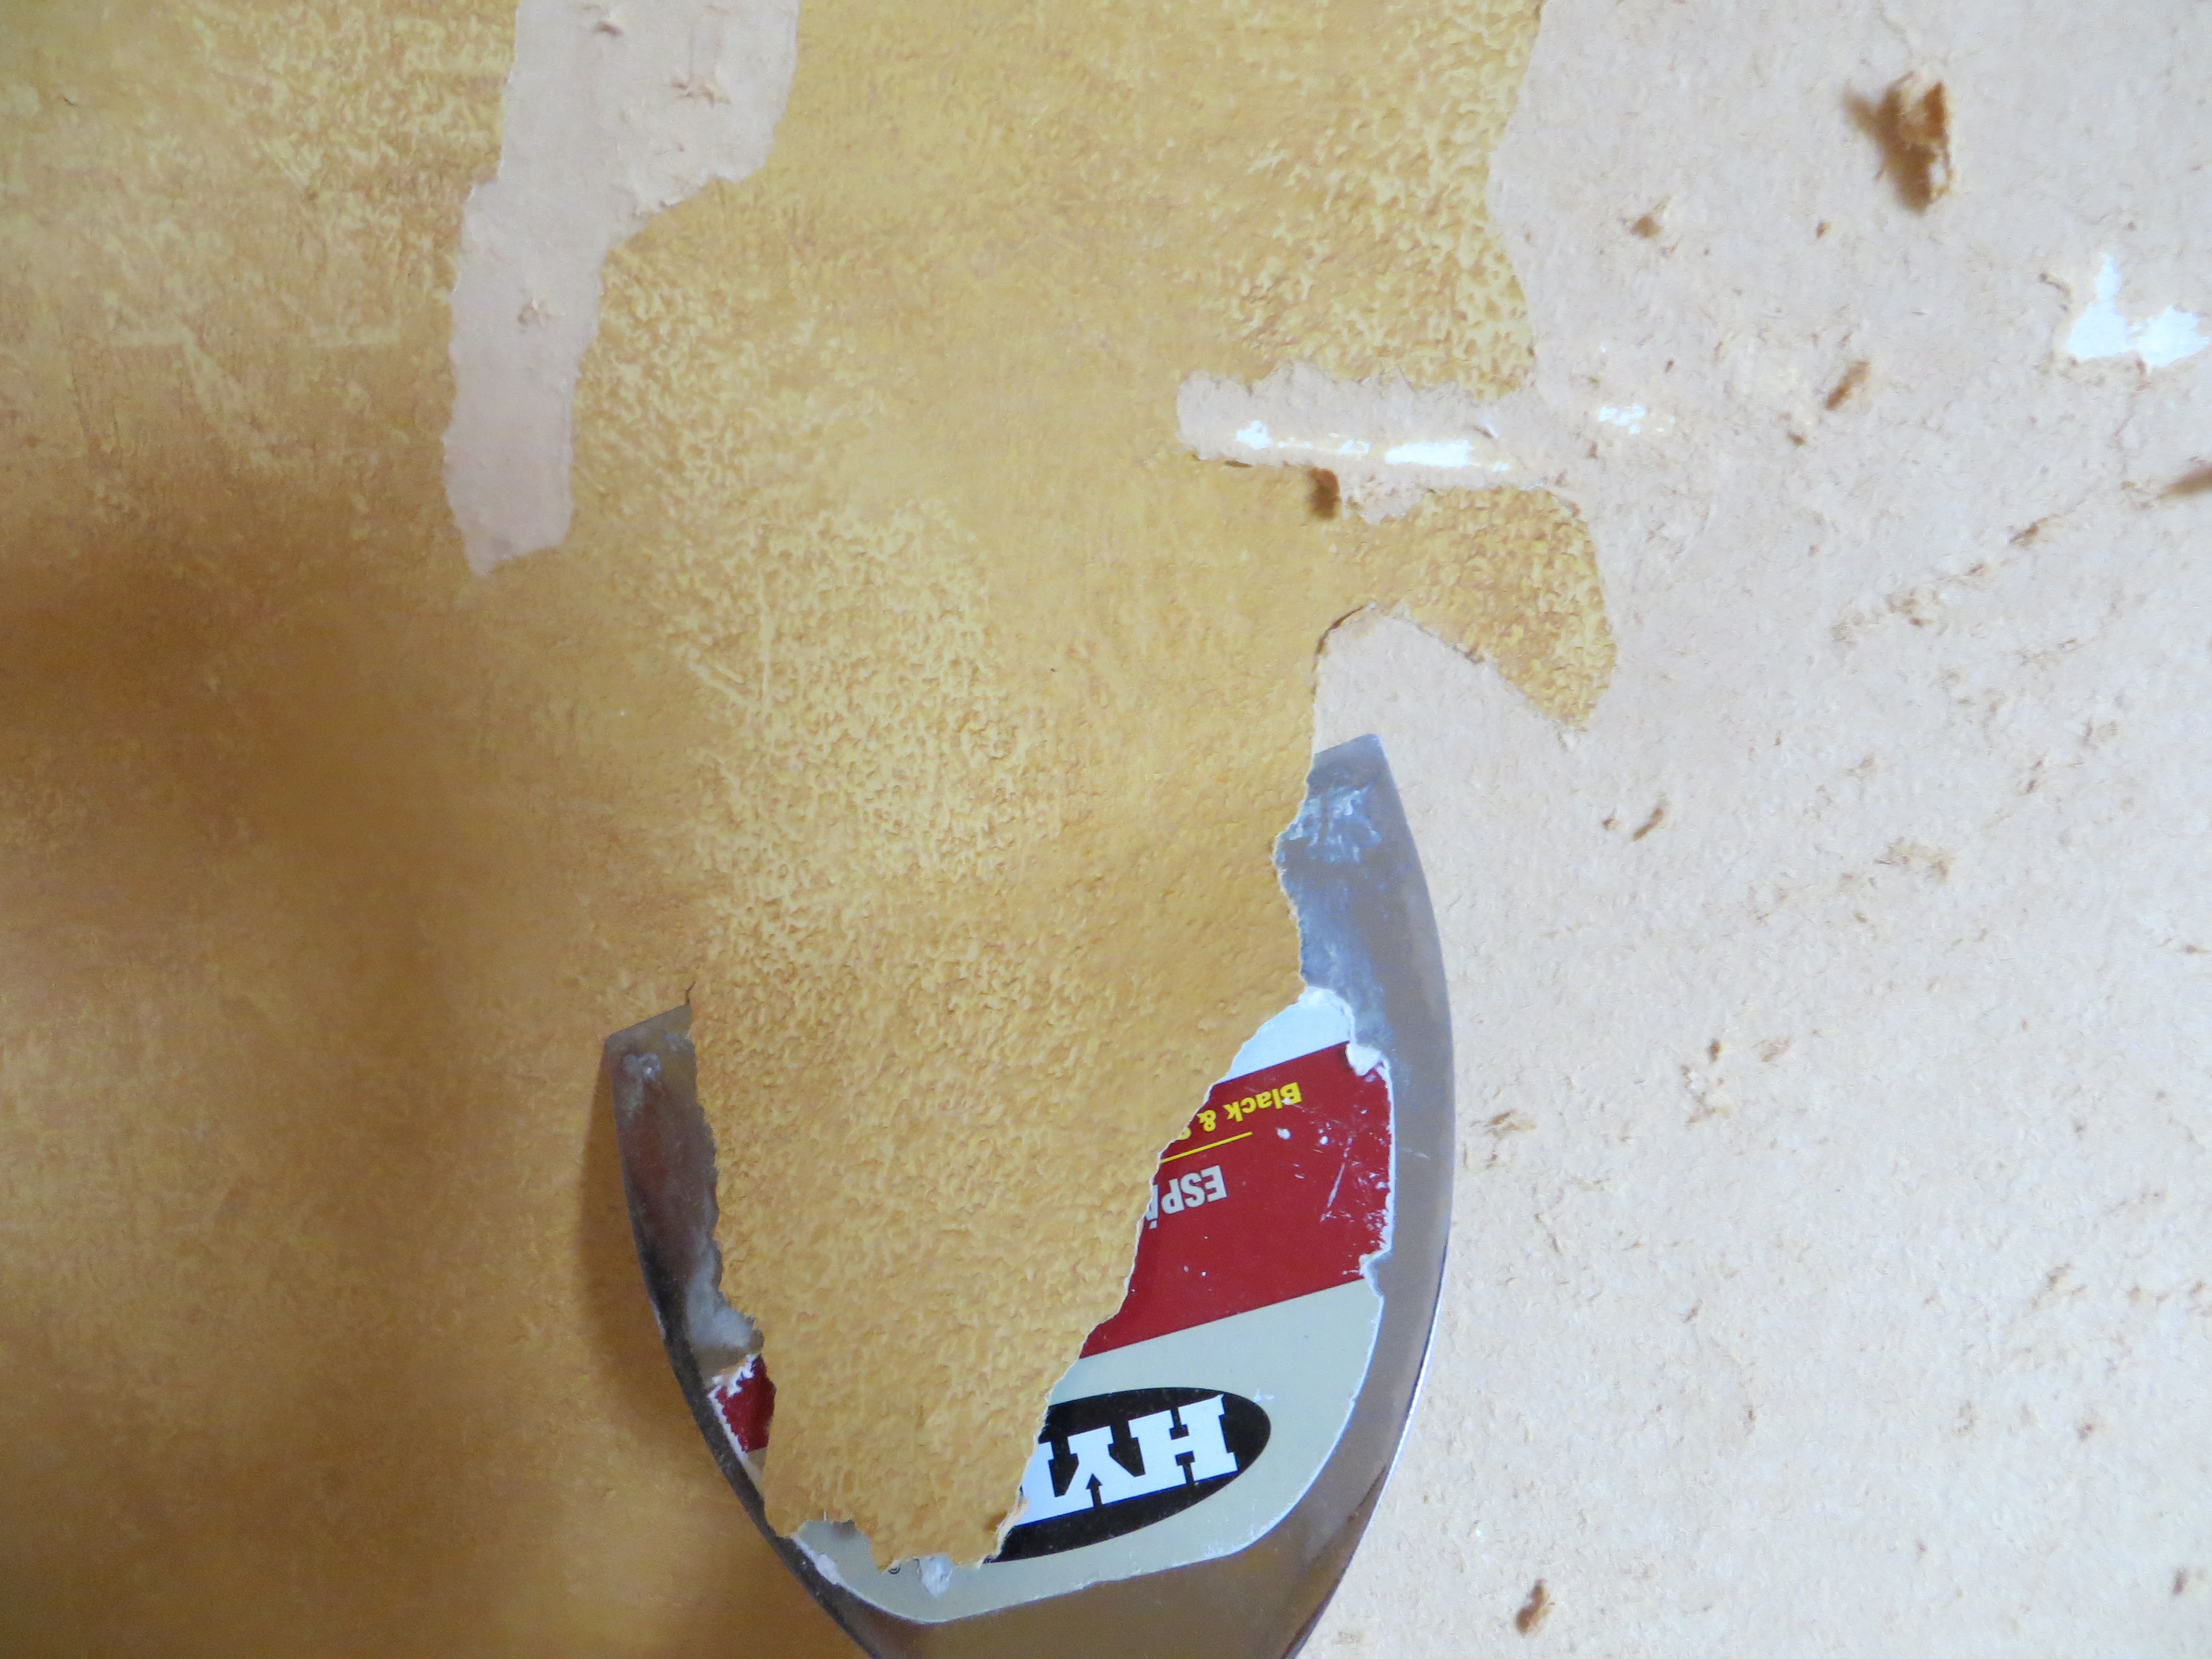
Removing wallpaper mess
- Overlay the ceiling with drywall. We did this because the ceiling had a heavy texture on it. The original plaster was starting to sag, so we worried about the integrity of the ceiling. Overlaying with new drywall solved both the texture issue and the plaster issues.
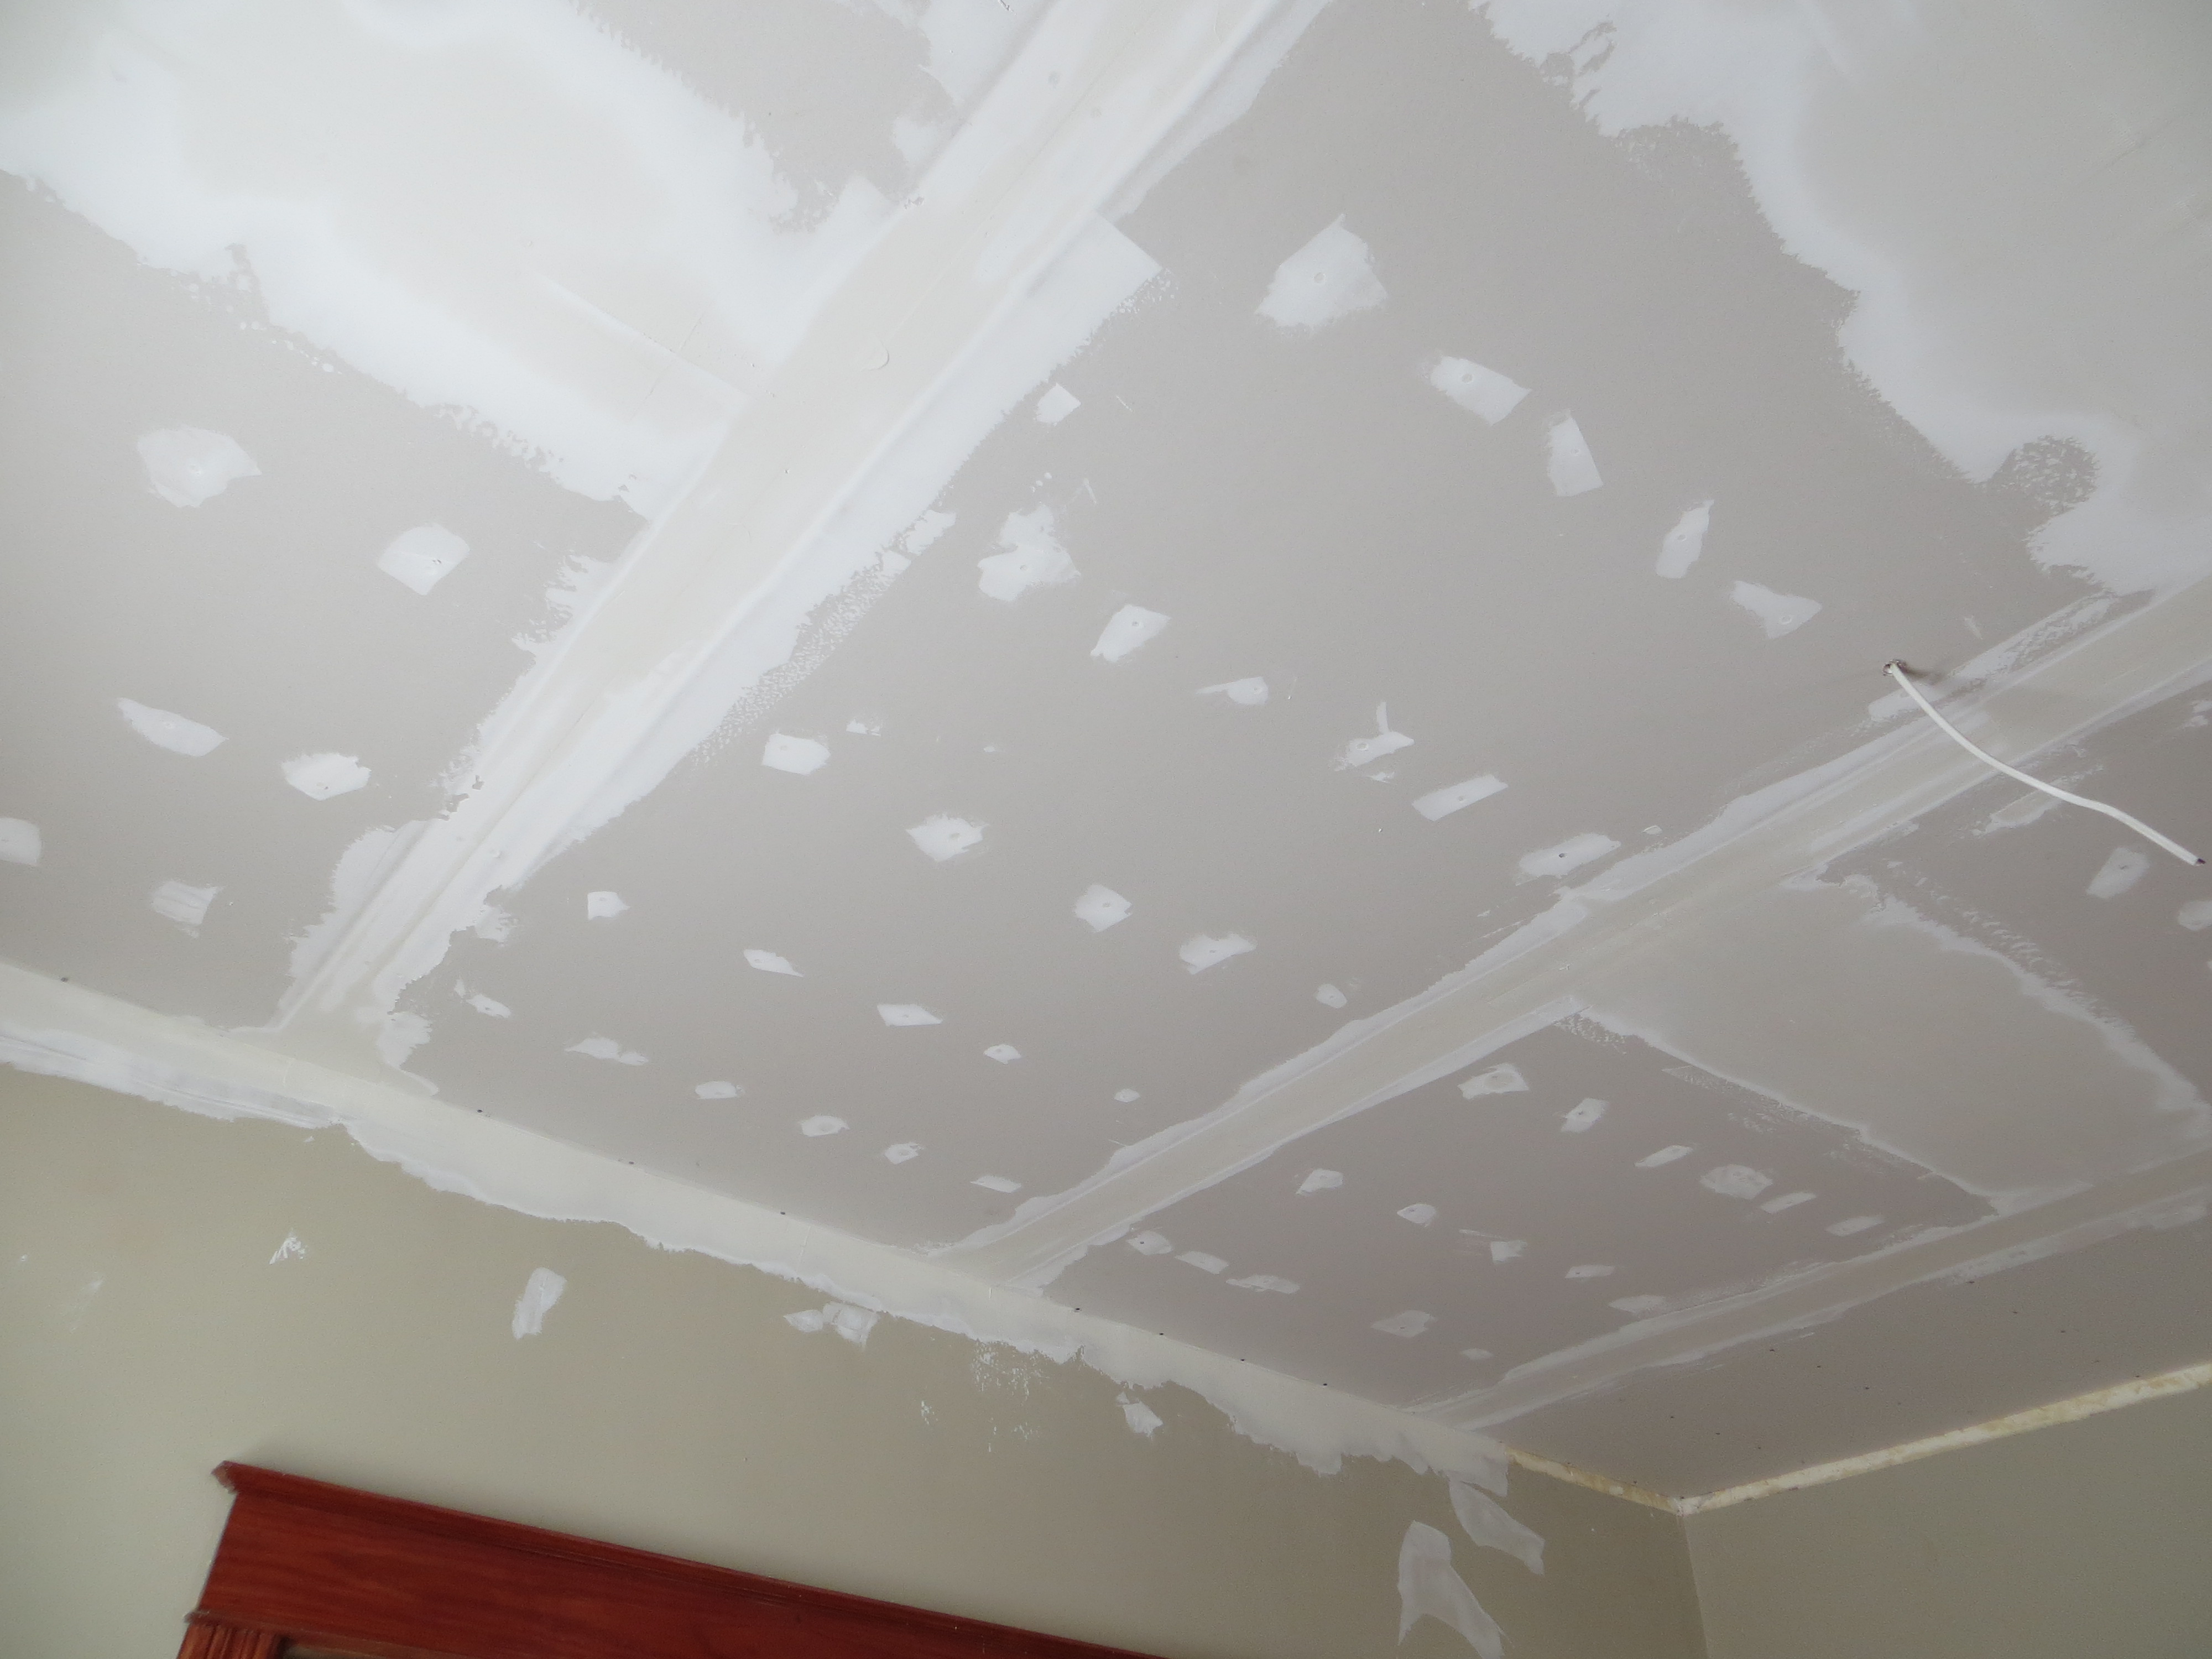
New drywall on ceiling
- Remove the laminate wood flooring that covered the original flooring and refinished the floors.

Front room with laminate removed
- Replaced all the electric and rewired the light.
Original light fixture rewired.
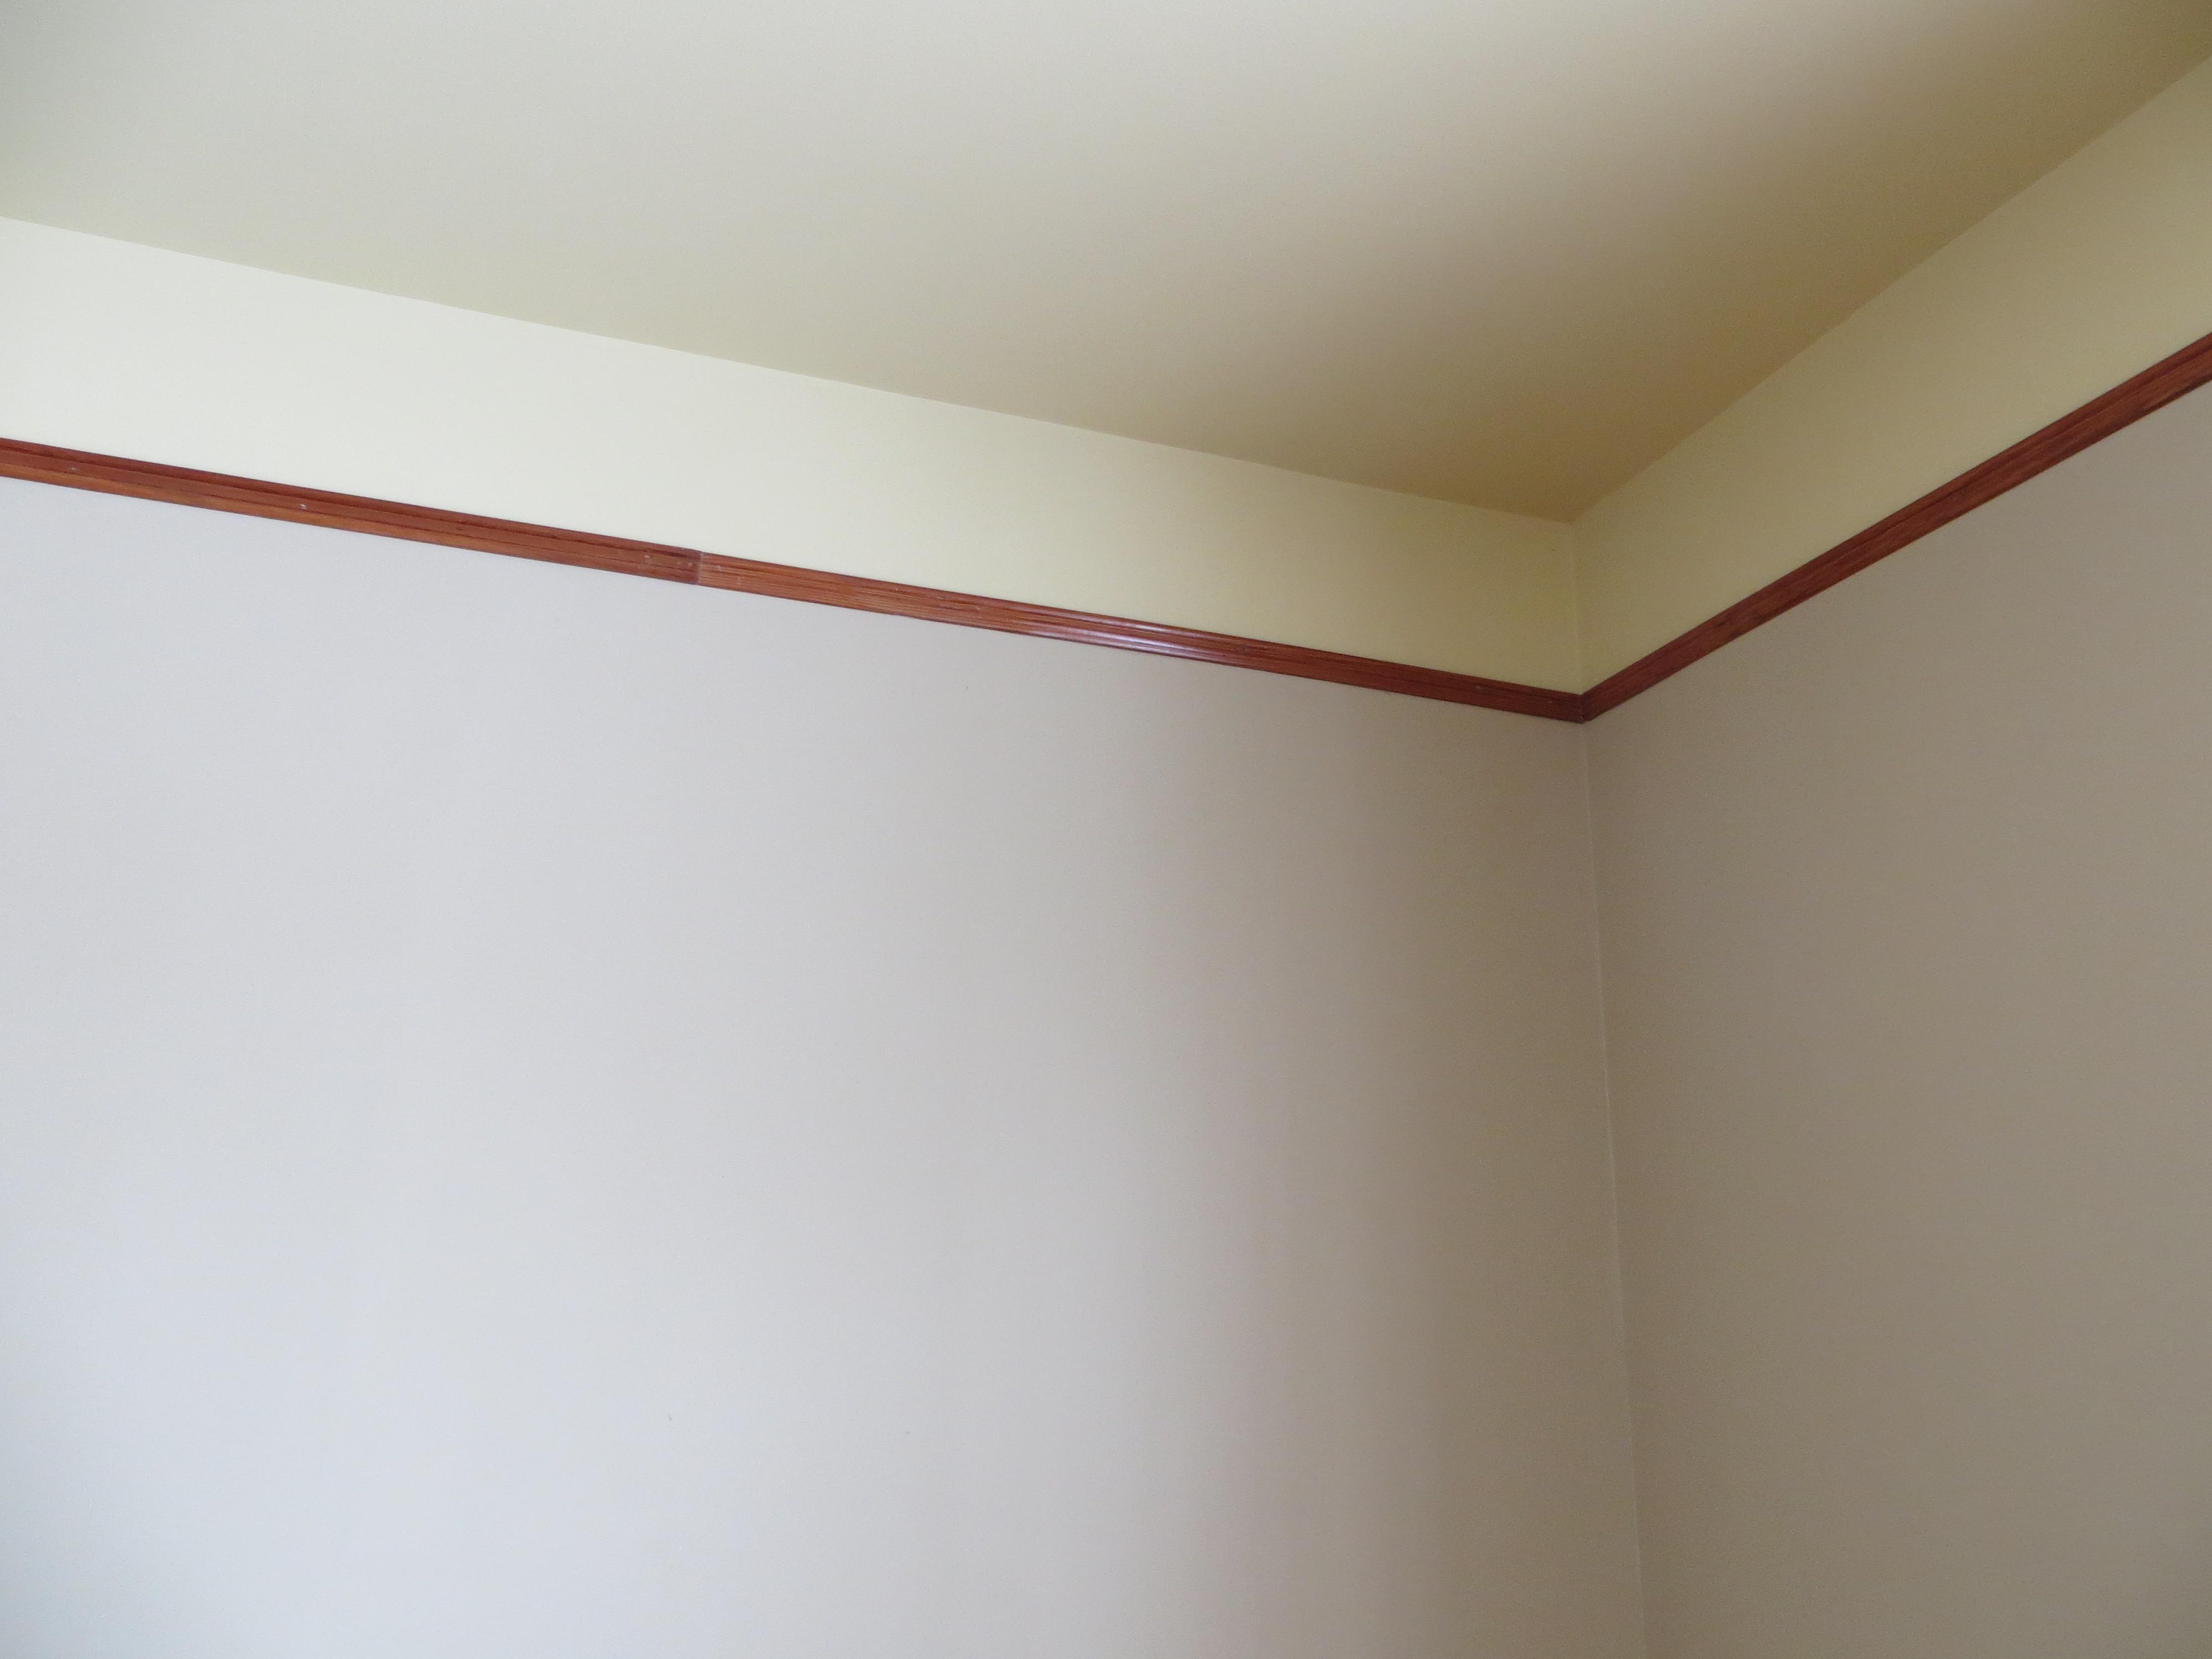
- Lowered the picture rail. If you’re not familiar with picture rail, it’s a common type of molding used in Victorian houses. Since the walls are plaster and lath, they are very difficult to hammer nails in to. Picture railing was hung, then hooks and chords were used to hang pictures. The picture rail in this room was at the top of the wall like crown molding. We removed and labeled each piece, cleaned the ceiling texture and paint off, then lowered it down the wall about 12 inches.
Picture rail lowered
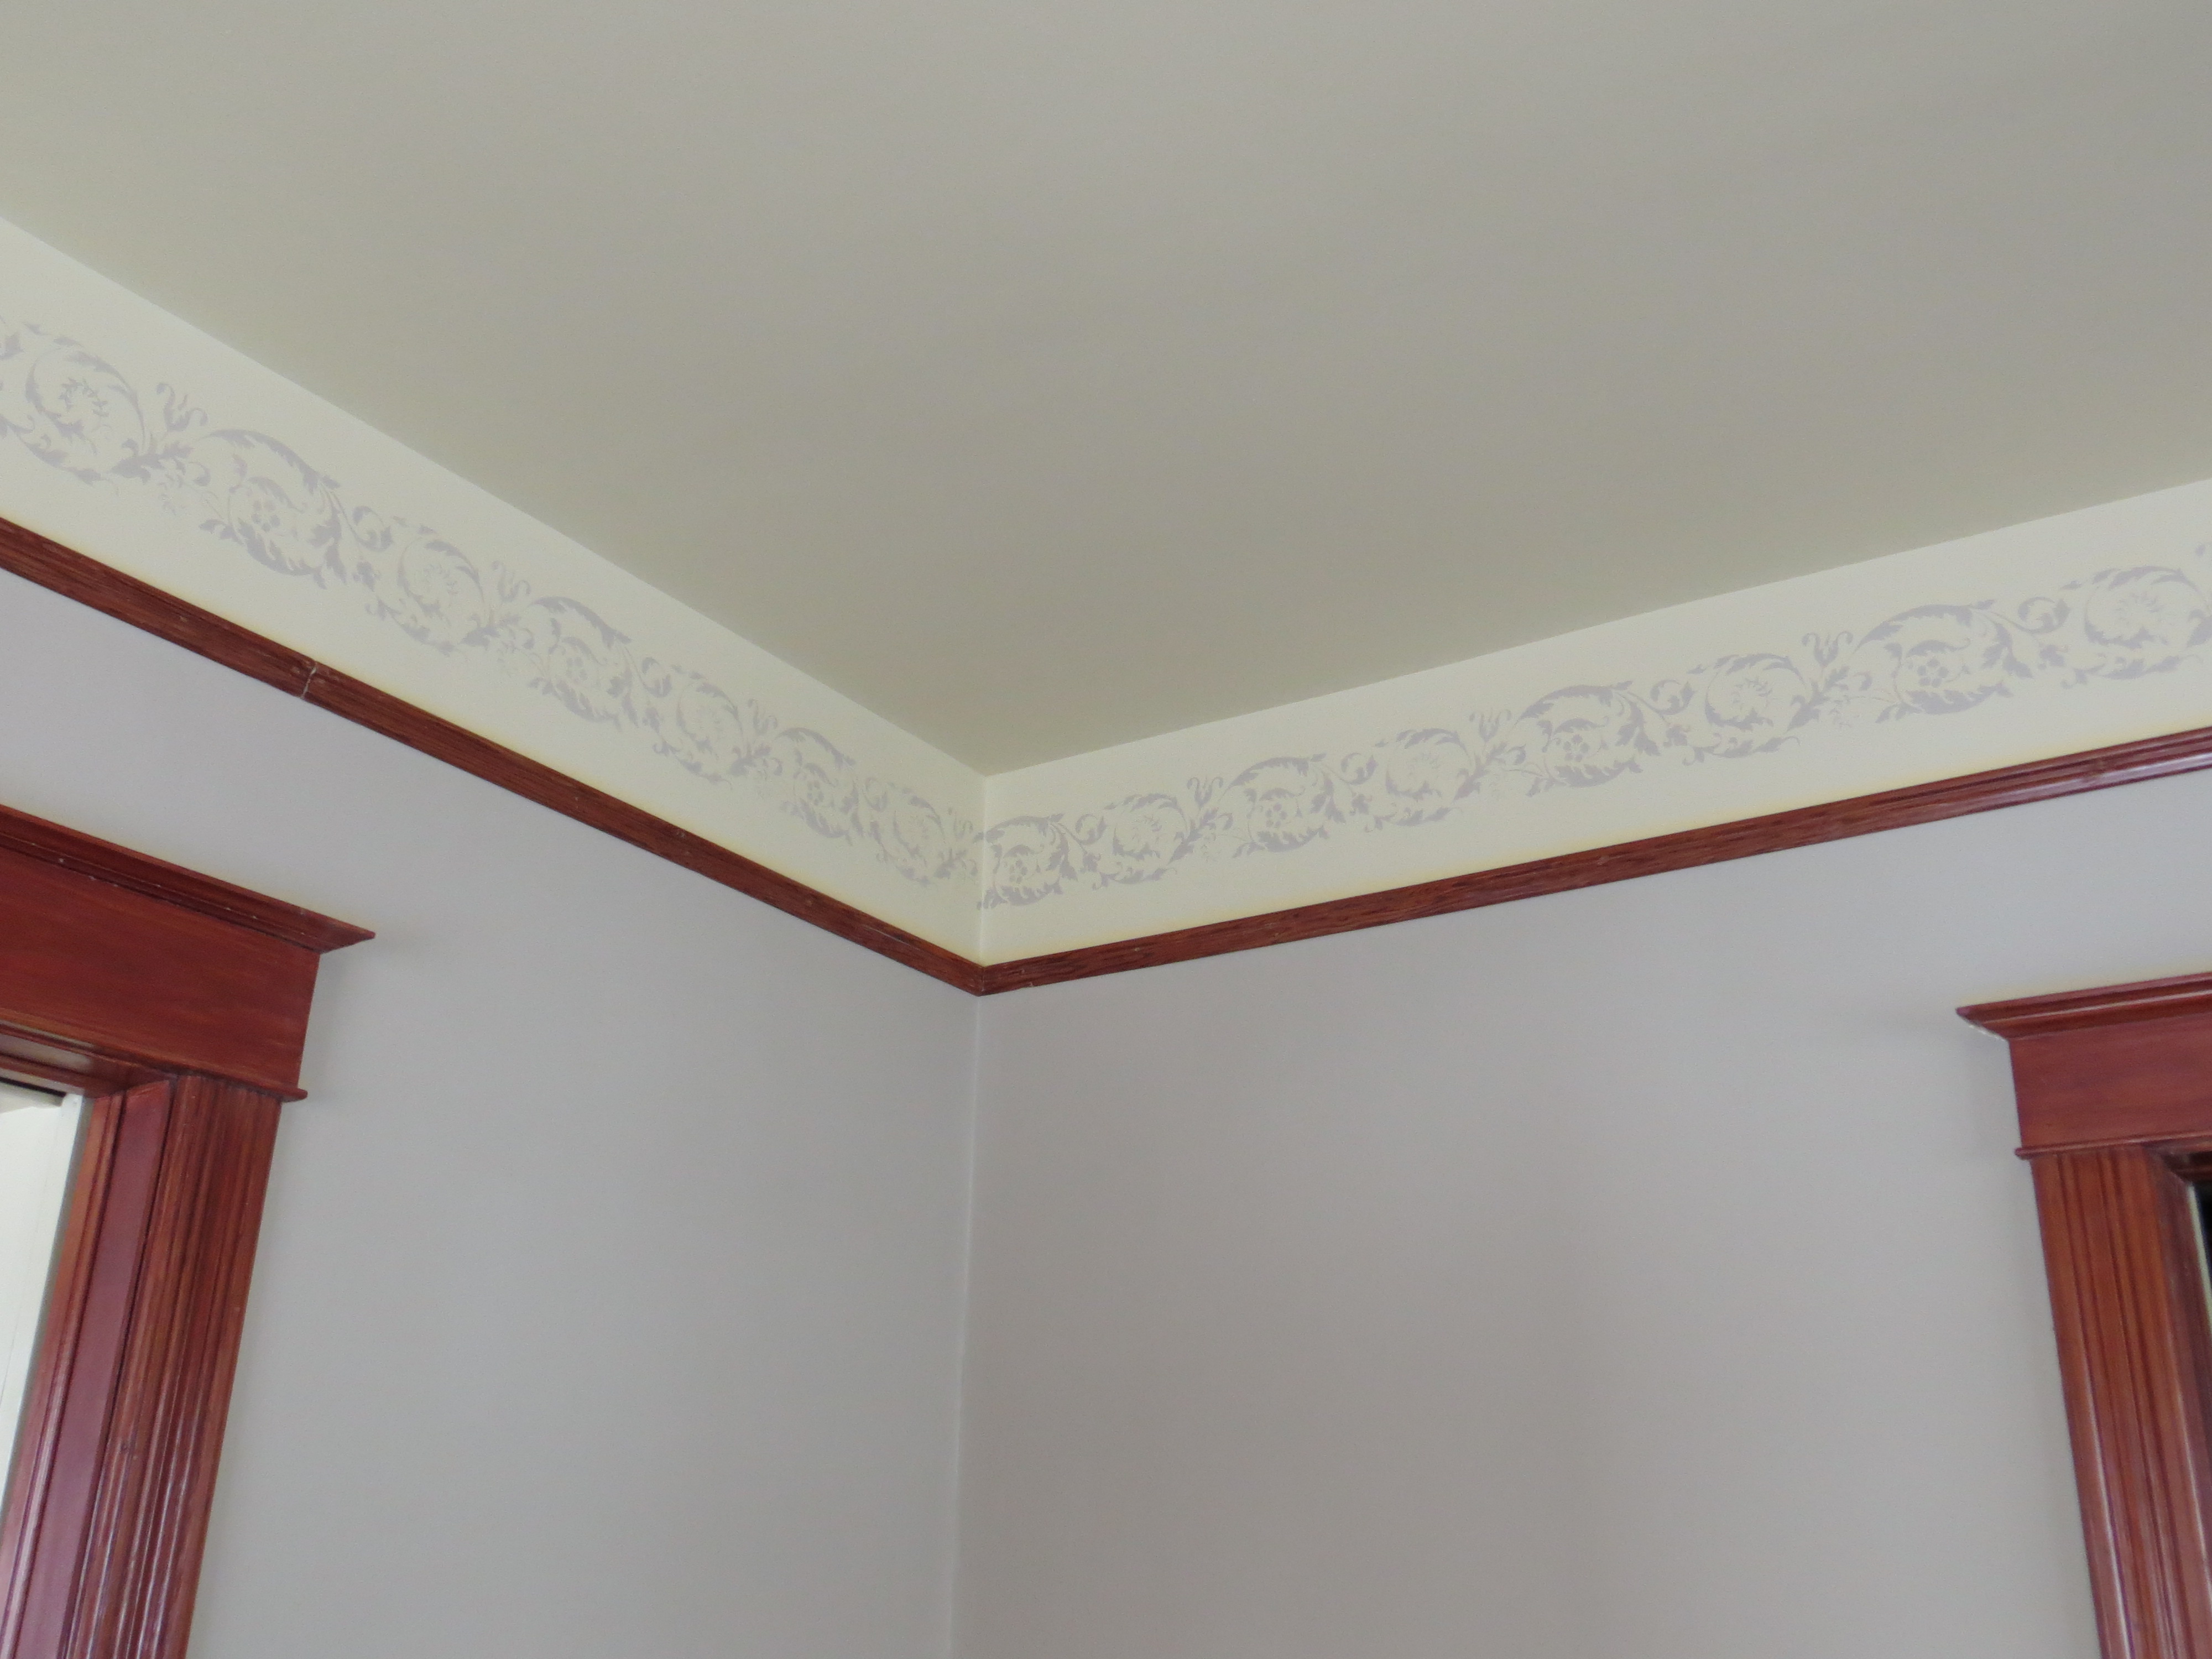
- And, of course, the stenciling at the top of the wall.
Oooh La La!
Here are the overall before and afters. Hope you all approve!
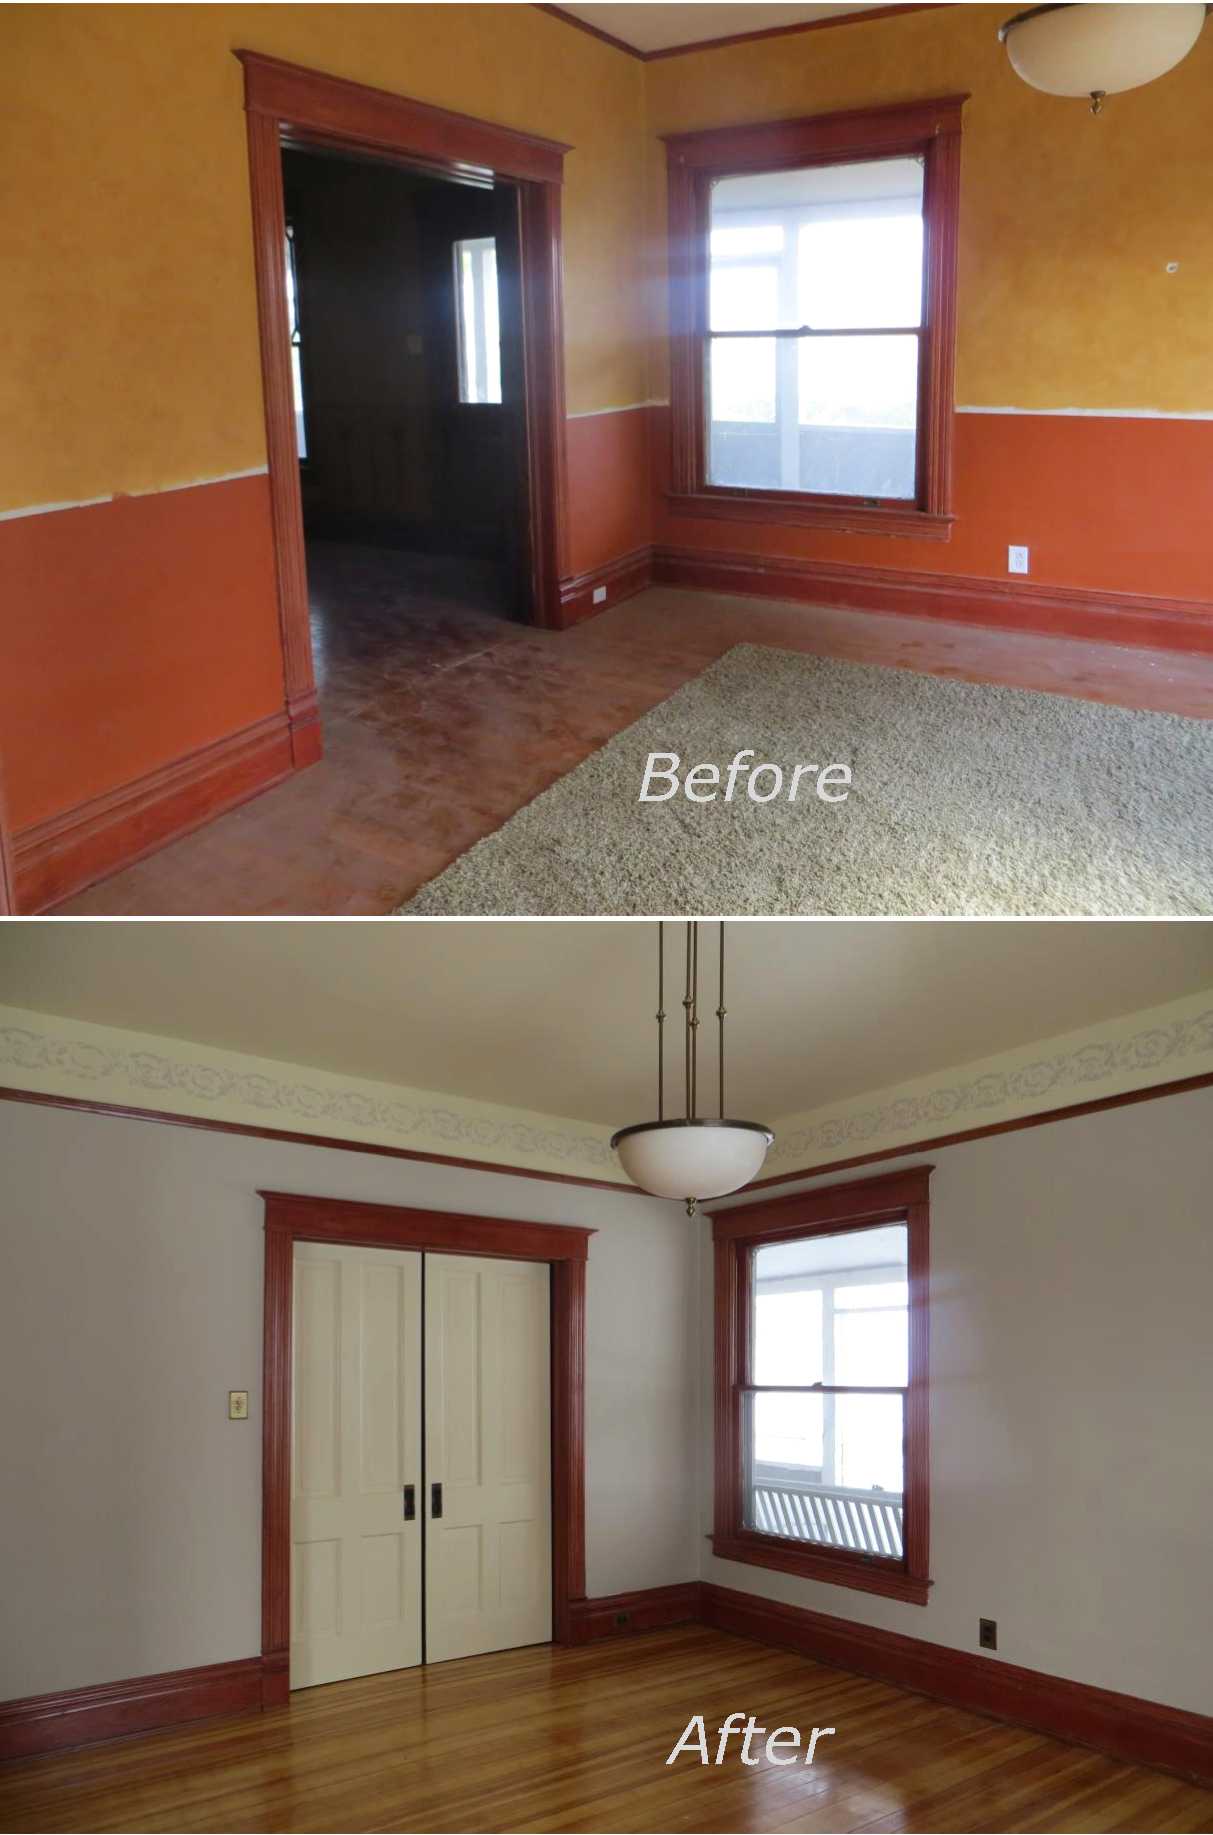
Front room Before and After
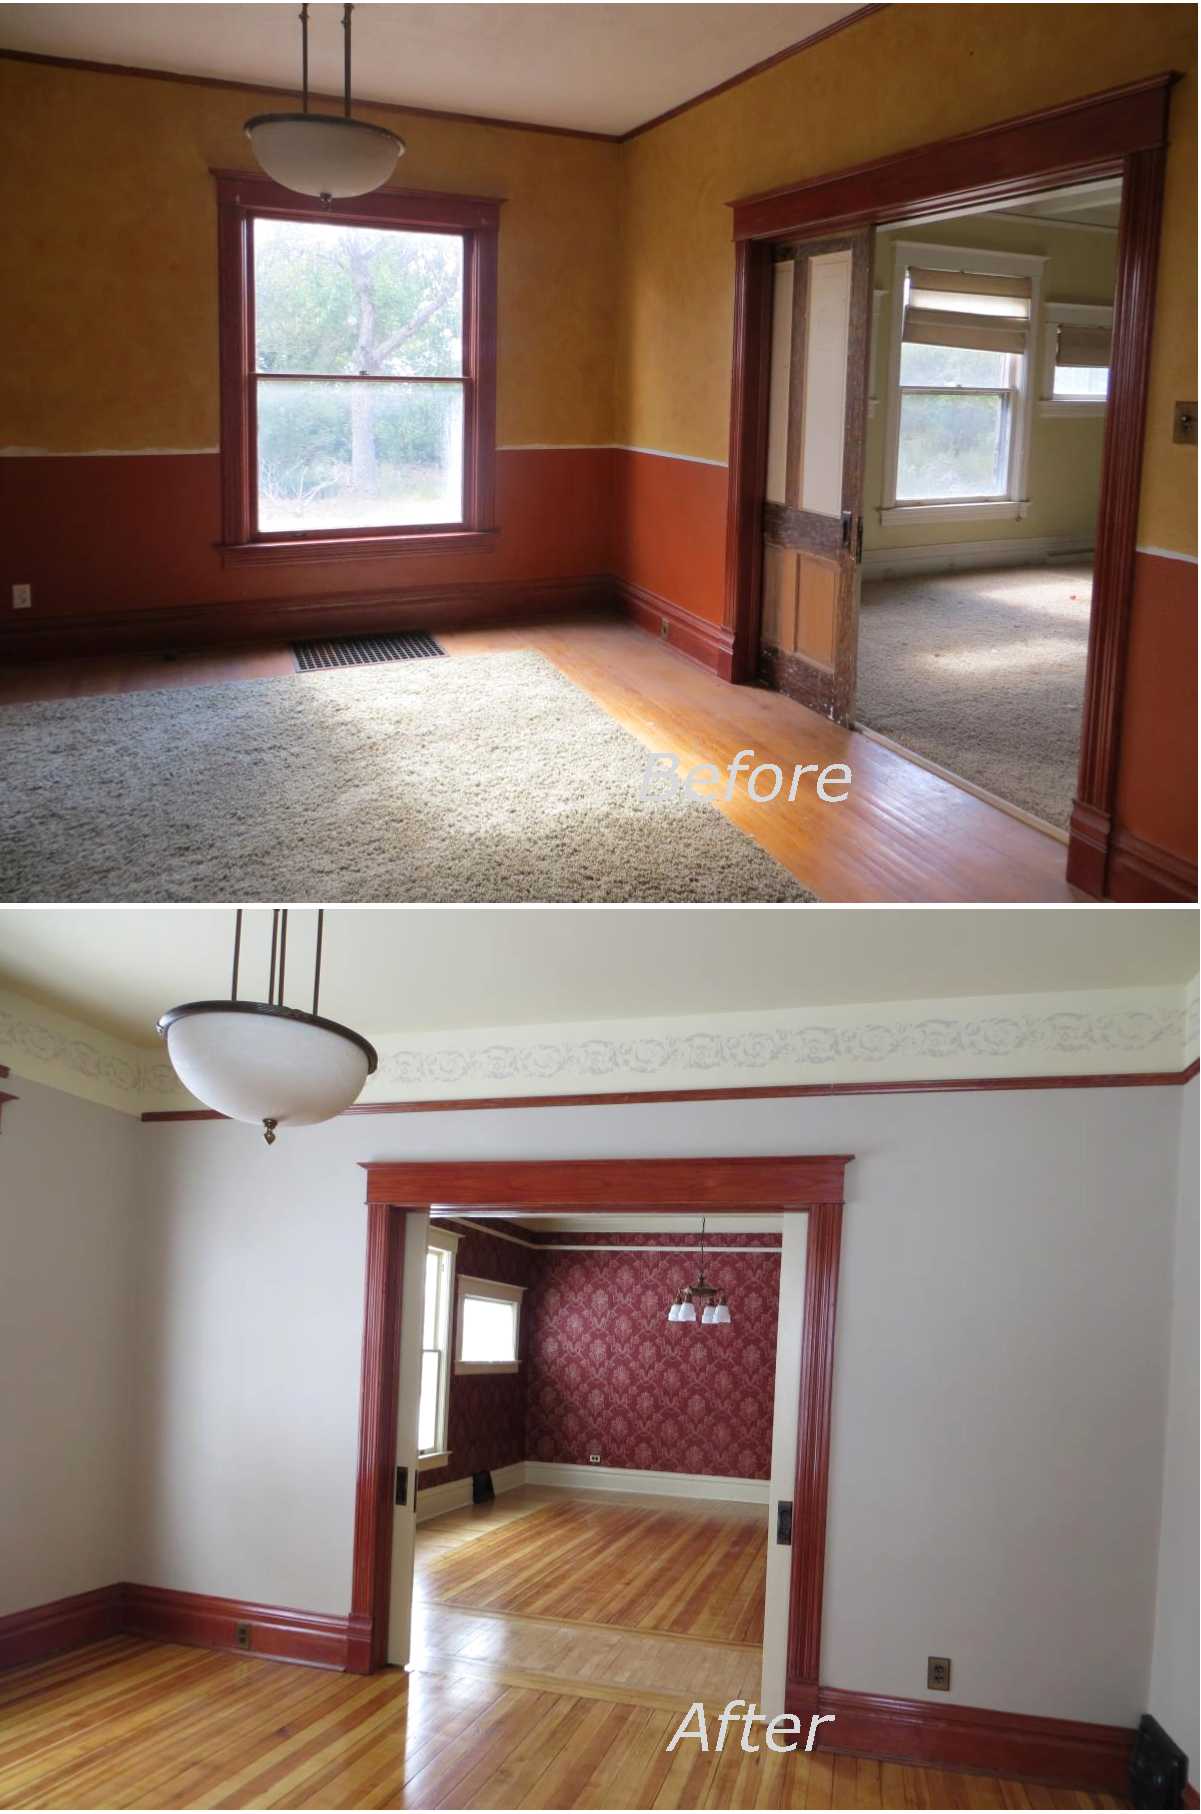
Front Room Before and After
You get a little sneak peek at the dining room there, but I’ll do a full before and after post here soon. Now, if we could just find some furniture for that room we’d be all set!
Oh my goodness, is this ever beautiful! What a lot of work and how lovely the result!
Rella – this is beautiful! What a fun project for you and your family! I’ve always wanted to do a renovation. I agree about the cherry stain – it is very pretty but… with the original wood floors it doesn’t really go. You could always strip the stain off, right? I mean, someday if you wan to put all that effort into it. I really like the stencil also – and that light fixture is beautiful. Nicely done Jaehn Family! Nicely done.
Awesome! Looks amazing!