Cat Box Camouflage

Problem 1:  Cat likes to poop and, despite scratching at the litter for 5 minutes afterwards, tends to leave the poop uncovered.

Problem 2: Dogs think cat poop tastes like delectable nuggets of savory goodness.

So……how to close down the cat litter buffet?

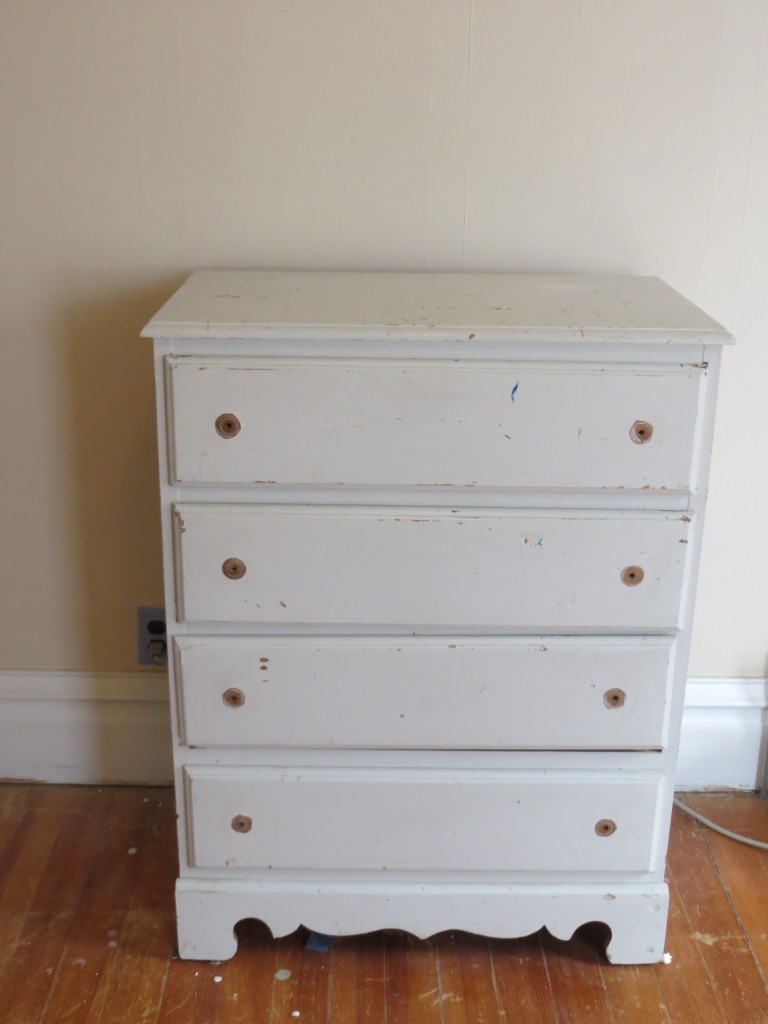
Step one:  Find an old dresser

Old dresser – hubby had this before we were married

Step two:  Remove bottom drawers and railing between the drawers

Step three:  Talk your husband into making a door that will fit the opening created by removing the drawers.

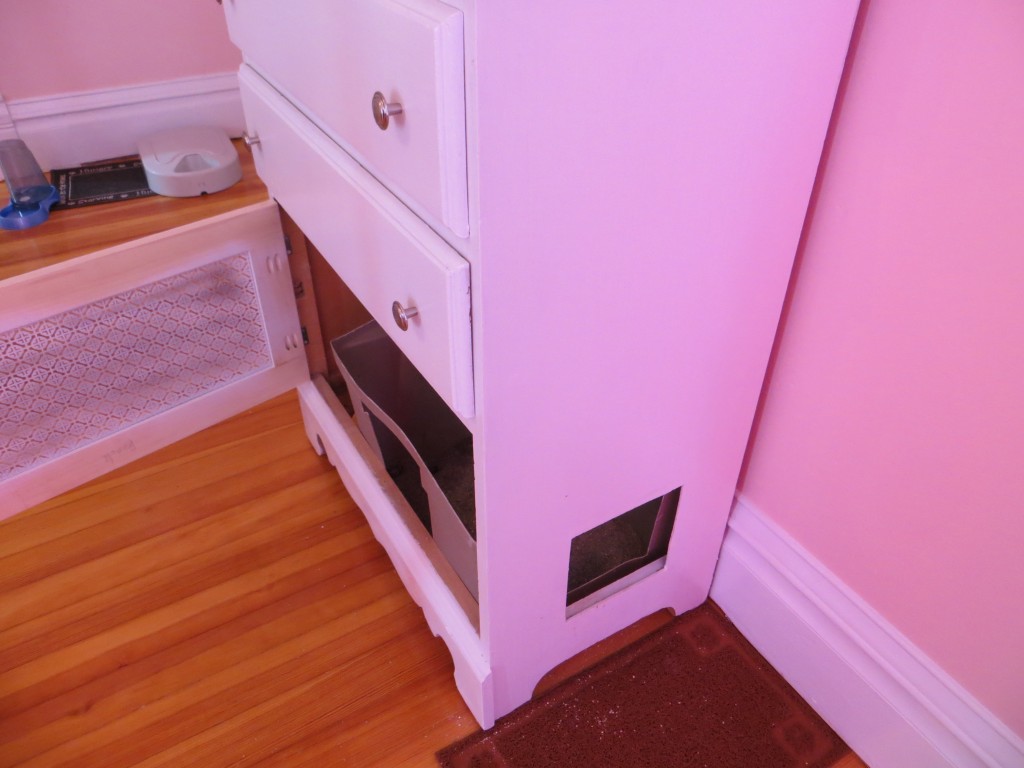
Step four:  Cut a hole in the side for the cat to enter/exit.

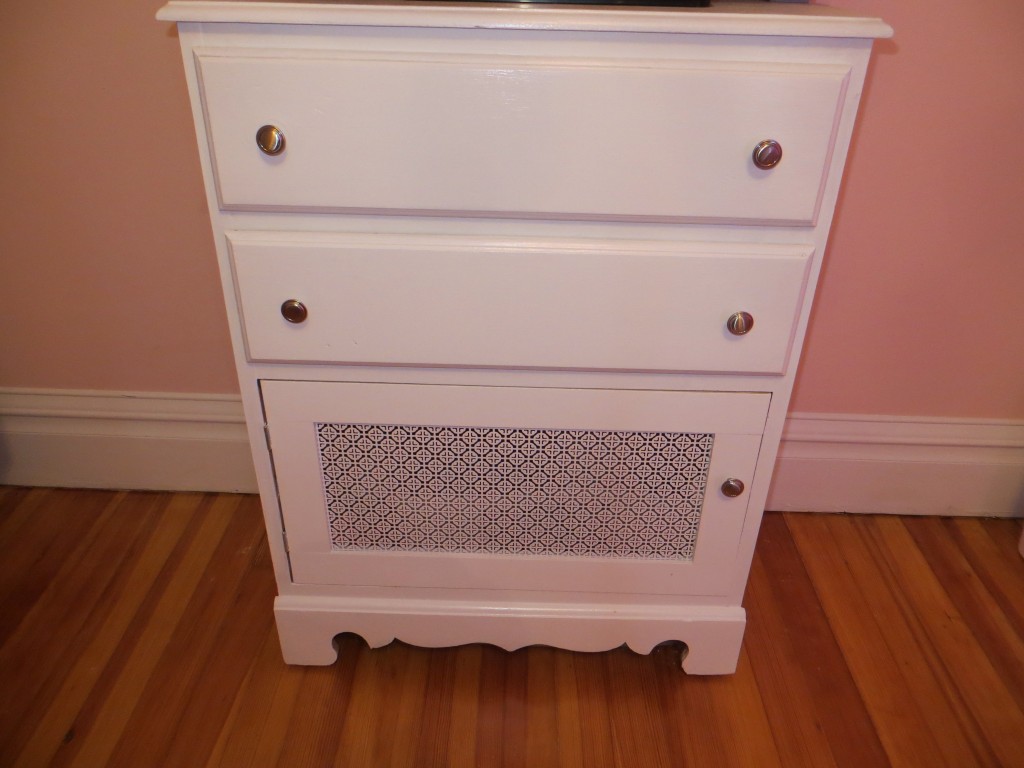
Step four:  Paint dresser, add some pretty new drawer pulls and voila!

Oooh! What a pretty piece of furniture! What could be behind the door?

Hidden cat box!

The fancy part of the middle of the door I found at Home Depot by the screen door aisle.  I think it is suppose to go in a screen door as a decorative piece.  It wasn’t cheap ($18, I think), but I wanted something that would look nice and would help with ventilation.  The cat box itself is a large storage tote with a hole cut in one side so the cat can enter/exit and a hole in the front to help with cleaning.

The cat has taken to the box no problem and the dogs have resorted to eating each other’s poo instead of the cat’s.  Sigh.

Posted in How To/DIY, Meanderings | 4 Comments

Kitties!!

A farm isn’t complete if it doesn’t have barn cats.  Barn cats are crucial in keeping the rodent population down.  That’s what I hear, anyway.  What’s difficult for me is that I’ve never had barn cats.  The one outdoor cat I’ve ever had was killed by the neighbor’s dogs in town.  I’ve worked on and off in veterinary clinics since I was 15 years old and it has been ingrained in me to take good care of my pets, feed them good food, and keep them safe.  The thought of having outdoor cats who run from me, eat crap food, and that I have no relationship with beyond the occasional glimpse of fur as they run away is foreign at best.  But, the thought of having a mouse infestation is much, much worse.

Early on, I found a local feral cat rescue group (Northern Colorado Friends of Ferals, if you’re interested) that traps, spays, and neuters feral cats and returns them to their colonies.  Occasionally, they need to place a colony of cats and look for families with barns who want a colony for their barn.  I thought this would be a perfect fit for us and contacted them.  Shortly after, we noticed an orange cat running across the field.  I started putting food out and every morning it was gone.  Soon enough, we discovered two orange cats running around.  Then, we saw a tiny orange and white kitty hiding one day.

Momma kitty and her first born

Shortly after learning that we had 3! cats running around, I got a call from the Feral group…they had a colony of cats for us!  Well, seems like we have our own colony already, so thanks, but I don’t want to become the crazy cat lady.

Too late….

About 6 weeks ago, I noticed that momma kitty was looking a bit round.  Yep, pregnant again.  Little whore.

I got a big dog kennel and put it in a safe place in the barn, barricaded it with a bale of hay, put a heated bed in, and put the food and water near by.  Nice place to have kittens, don’t you think?  I still worried, as I watched momma’s belly grow, that she would have the kitties in a hidden place we wouldn’t be able to find.

Yesterday, as the wind whipped cold air in my face, I heard a faint mewing.  After some investigation, I found momma and her 5 new babies.  Were they in the wonderful, soft, warm, protected area I set up for them?  Hell no!  She had them in a metal feed trough outside!  Totally unprotected and freezing!  ARG!

Not a great place to have kittens

I knew I had to move them, but I worried that momma would rip me in half if I tried.  Fortunately, she looked as surprised at her situation as I was.  She purred as I rubbed her head and I thought I had a chance.  I started with the kitten she kicked away.  The one who was barely moving and who I thought was dead when I first saw him.  I slowly reached in and pulled him to me….momma didn’t seem to mind.  I wrapped him in a wash cloth and handed him to the eldest….she started rubbing him to warm him and revive him.  Then, I had to move her to get to the others.  I handed one to my youngest and grabbed the last 3, wrapping them up against the cold wind.  We took them into the barn and put them on the heated bed.  Momma followed us in, curled up around her brood, and looked content with the change.

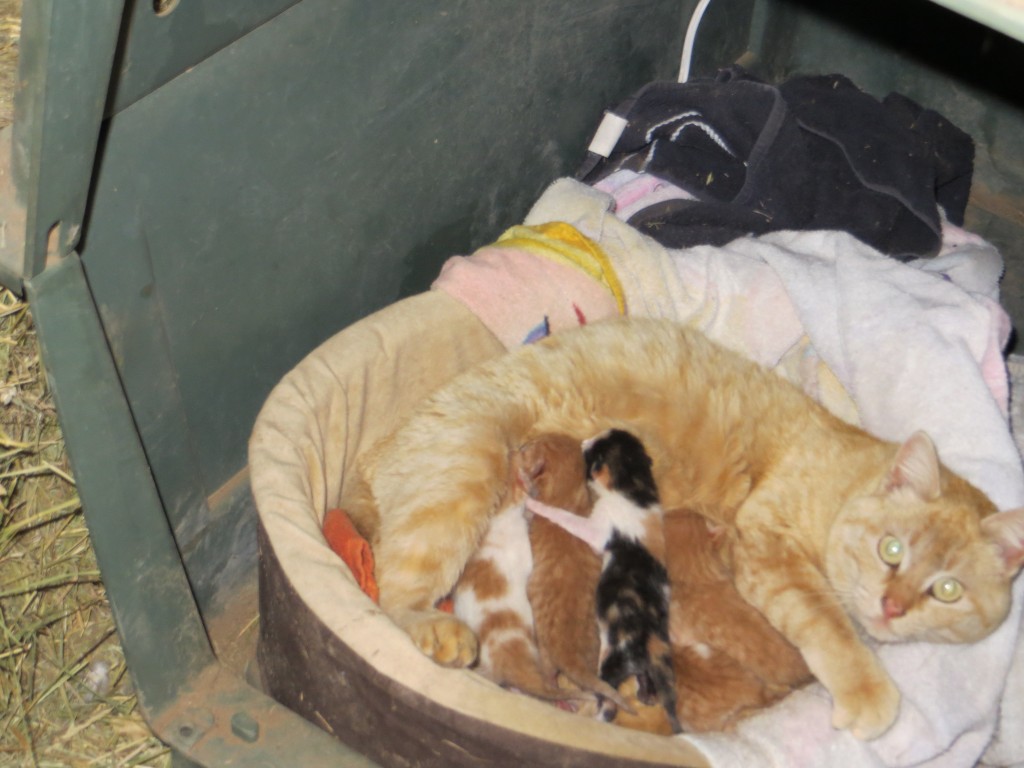
For now, we have 5 brand new kittens.  Safe and warm in the barn.  Even the one momma kicked away seems to be thriving!  Here’s the brood:

Momma and her babies!


Posted in Meanderings | 3 Comments

Blowing in the wind

Well, we survived the Spring Blizzard of 2013.  I think we got all of 4 inches of snow.  Big effin’ deal..  Funny how the news outlets seemed to get very defensive of their forecast as the day went on.  Multiple news outlets explained that a “blizzard” is defined more by the wind than the snow accumulation.  Well, we didn’t really get the snow, but we sure as hell got the wind.   The kids got a snow day, though, so not all was lost.  Fun afternoon of watching Jaws and eating popcorn.

We’ve lived in 3 old houses over the past 14 years, but the previous 2 were in town.  I think in town, even when it is windy, it’s never too bad.  Out here, there is no protection from the elements.  I thought I knew what “drafty” meant, but I was sadly mistaken.  THIS house is drafty.

On Monday night, we were sitting watching TV watching the drapes literallybillow from the wind blowing in.  Our daughter’s room had a pile of SNOW that blew in from the cracks in the window.  Two full snowballs worth of snow.  We could have had a mini snowball fight in her room!  Nearly all of the windows had a layer of dirt on the window sills.  One of the doors had so much dirt blown in, you could start a garden in front of the door.

Um, guess we have some insulation and window repairs to do this summer!

Hope everyone else survived the “storm” and enjoyed their snow day.  We’ve finished the eldest’s room except for a few details.  I hope to get it finished this weekend so I can show you another before/after!

Posted in Meanderings | 2 Comments

How To Strip Paint off Antique Hardware – Without chemicals!

We feel extremely lucky to still have all the original hardware in this house.  Honestly, it was one of the selling features.  The house had a lot of things wrong…like no kitchen and a bathroom with no floor…BUT, it had most of the original hardware and trim.  Many old houses had these things ripped out along the way when “modern” renovations were done.  To replace door knobs, hinges, and the like with either reproductions or actual antiques gets extremely pricey.

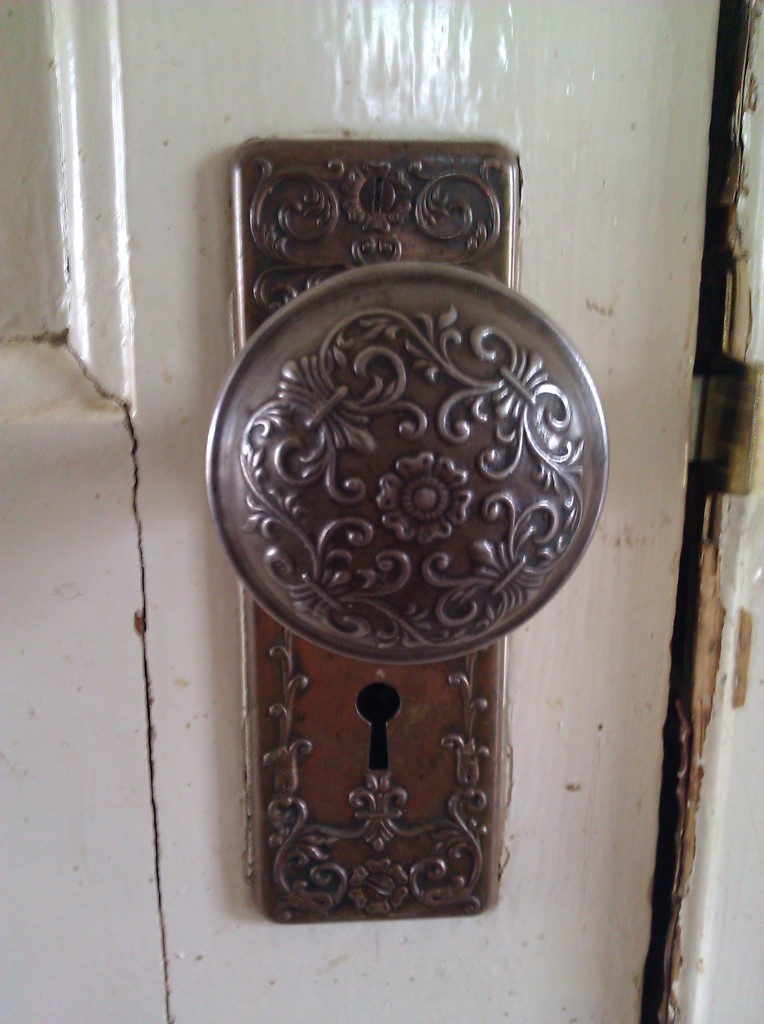
Here’s what our door knobs look like:

Purdy, huh?

Even if you have the original hardware, it likely has paint on part or all of it.  Maybe even multiple layers of paint.  So, the question becomes…how do you remove all that paint?

We’ve tried many different methods and have found a way that uses NO chemicals and is very easy.

Tools Required:

  • Metal hardware with unwanted paint on it
  • Scrubby sponge – I use the one that is safe for non stick pans…it’s scrubby, but won’t scratch.
  • Rubber gloves – I use the ones you find in the cleaning aisle
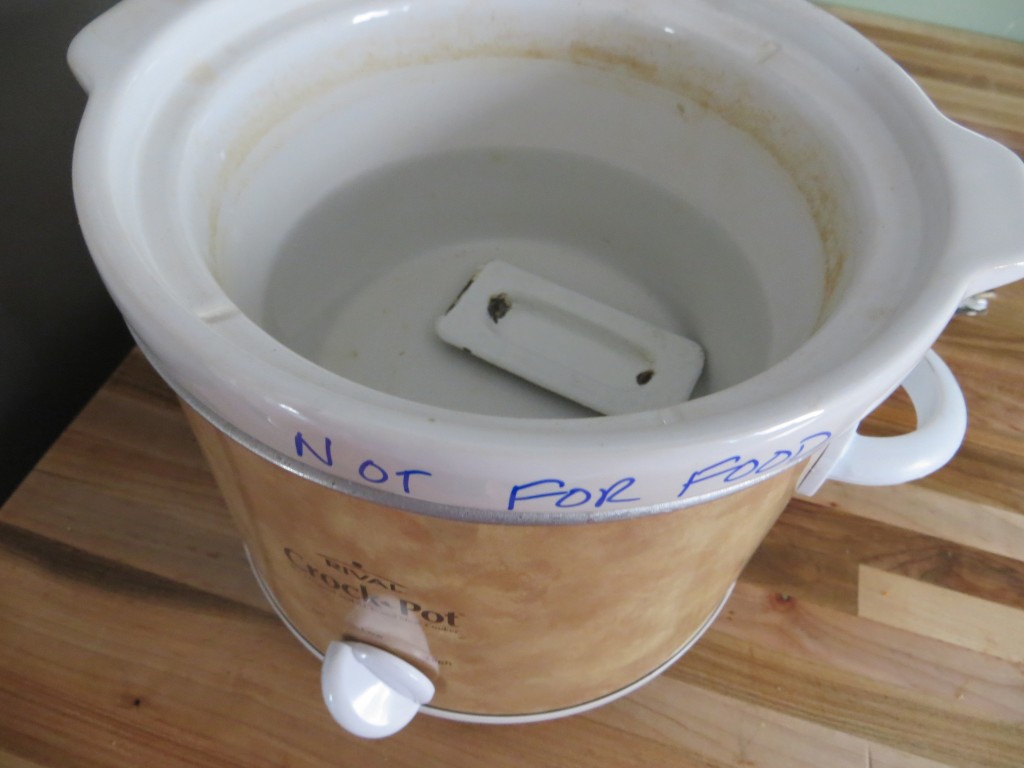
  • Crock pot – one that you will NEVER use for food again.  If you don’t have an extra, try looking at second hand stores to buy one for this purpose.

Step one:  Fill crock pot 1/2-3/4 of the way with water, plug in, and turn on “low” heat.

Step two:  Put painted trim in crock pot.  You can put multiple pieces in at once.

Cooking the hardware

Step three:  Let the hardware cook for a while.  I usually toss it in when we start a project in the morning, let it cook all day, then clean the hardware at the end of the day.  It’s sort of my reward for working all day.  I know, weird to think of cleaning hardware as a reward…

Step four:  Put on your rubber gloves.  The purpose of these gloves is two fold…first off, it allows you to handle the hot metal hardware without burning the heck out of your hands.  It’s still hot and you have to be careful to not burn yourself, but the gloves help a lot.  Second, it protects your hands from getting paint all over them.  It may be a good idea to wear safety glasses and a respirator since you *may* be dealing with lead paint.  The paint is wet, though, which definitely helps prevent lead paint dust.

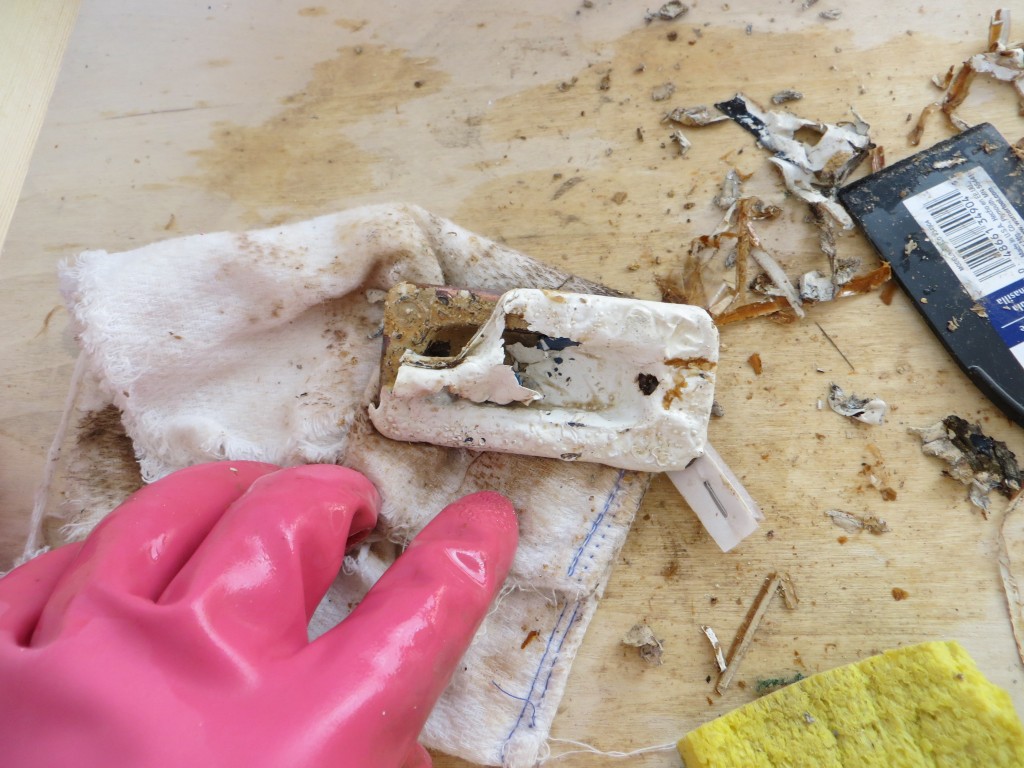
Step five:  Remove the hardware from the crock pot and start cleaning with your scrubby sponge.  You’ll find that most of the paint will peel off easily and you’ll only need to focus on the detailed parts of the piece.

Paint peeling off the hardware

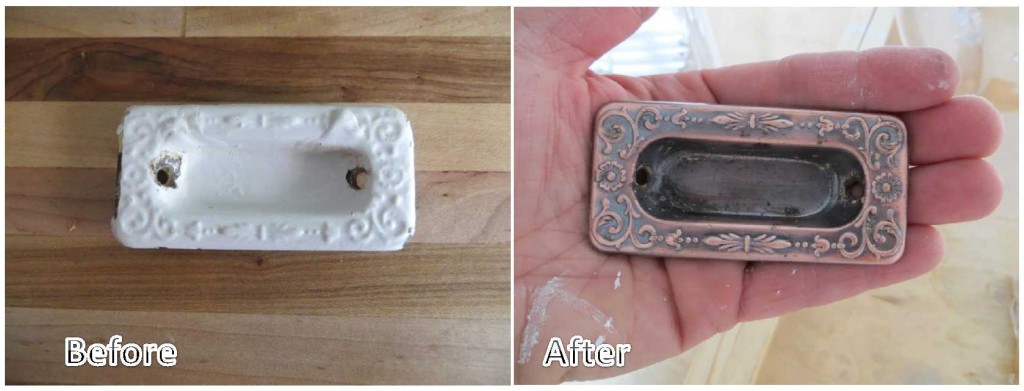
After a few minutes and some scrubbing, your hardware will be revealed!

Before and after window pull

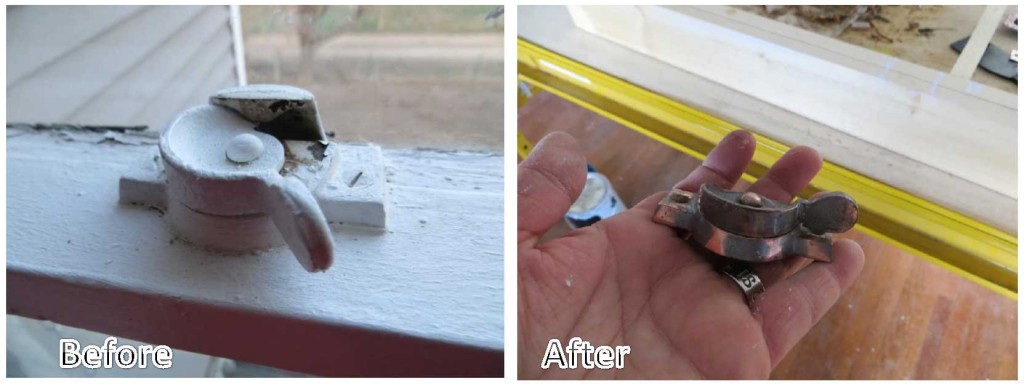
Here’s a window sash lock that I was going to throw away.  Glad I tried the paint removal trick before I tossed it!

Sash lock before and after

A few words of caution…be careful when handling lead paint and do not flush any paint chips down the drain!  Also, the hardware gets very hot, use caution so you don’t burn yourself!

Happy paint stripping!

Posted in How To/DIY | 4 Comments

The bathroom that wasn’t….is. Before and after

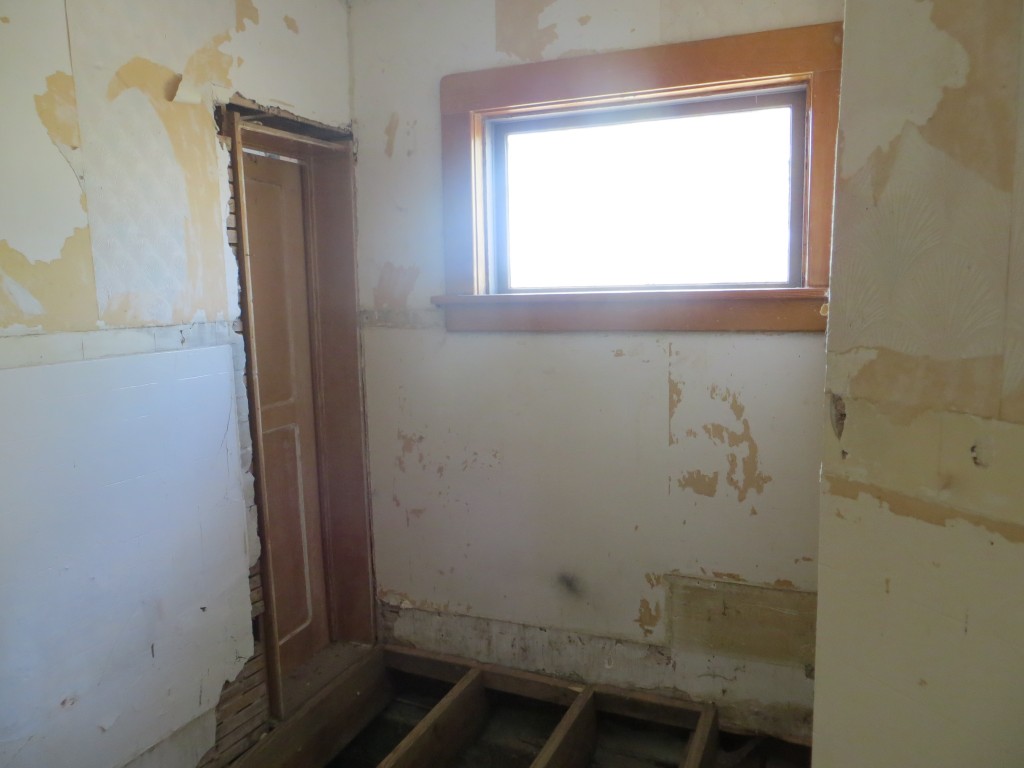
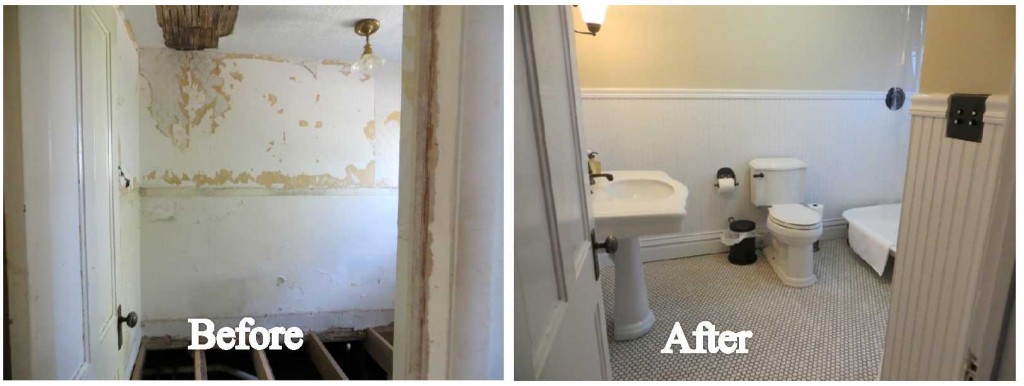
This project was completed a loooong time ago, but I haven’t posted about it yet.  When we looked at this house, there was a room that was once a bathroom.  At least I think that’s what it once was.  It looked like this:

Bathroom or portal to hell?

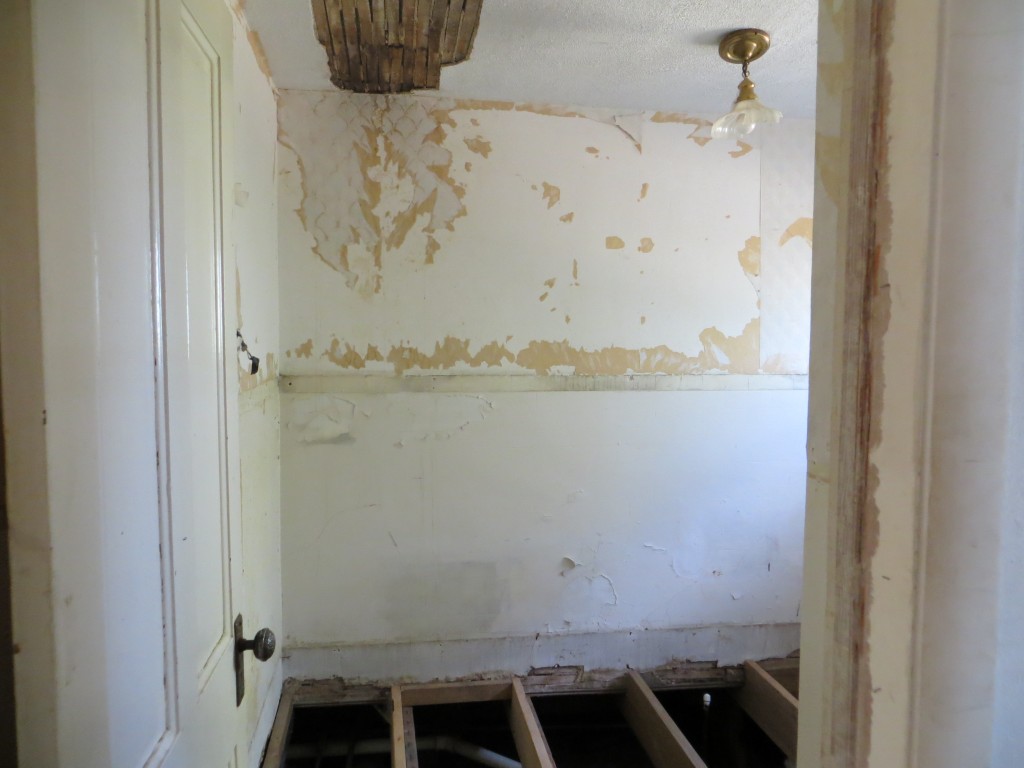
See how there’s no floor?  Literally, no floor?  That’s how it was BEFORE we got here.  The story I got from the previous owner was that the owner before her would lock the cats into this bathroom and they peed all over.  Apparently the floor was soaked with urine and reeked, so they tore it up.  Glad they did that job for us!  Ew.

We thought of just keeping the door shut for….forever, but decided the appraiser wouldn’t like that very much.  So, this was a room that we actually finished before we bought the house.  Risky, huh?

Entrance to bathroom

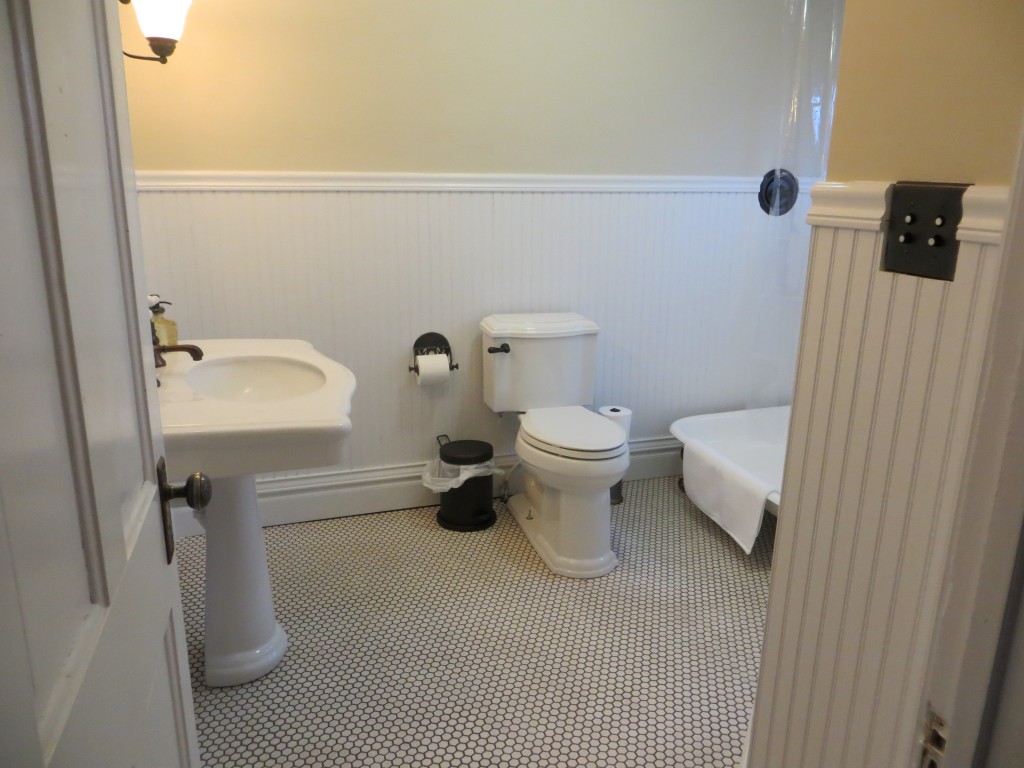
And after..

AFTER!

If you’re interested here’s where you can get the sink, and bathroom faucet.  We got the toilet and hex tiles from Lowe’s.  The push button light switches match the originals, but are new.  We put these in the kitchen, too and got them here.

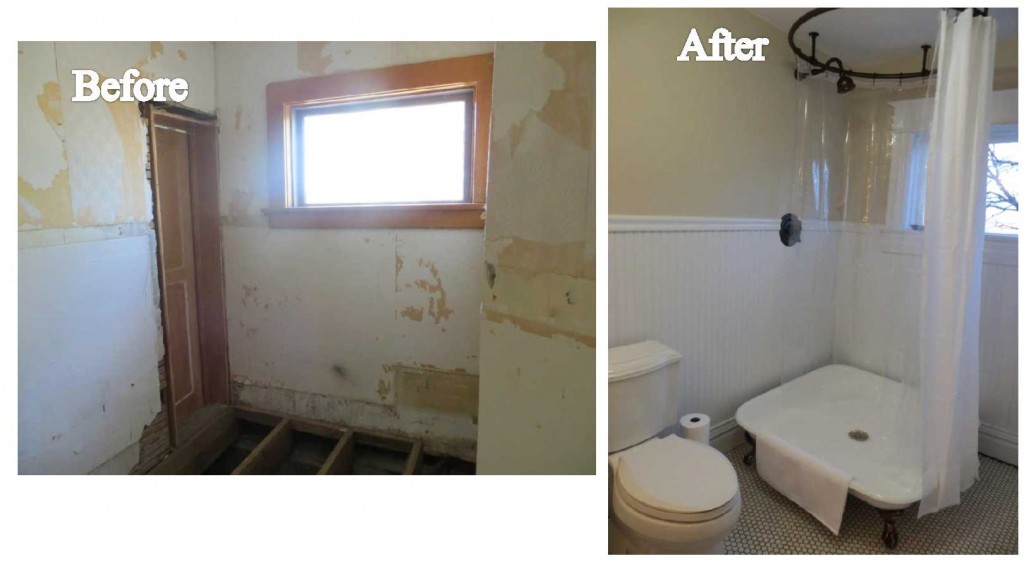
Here’s my favorite part:

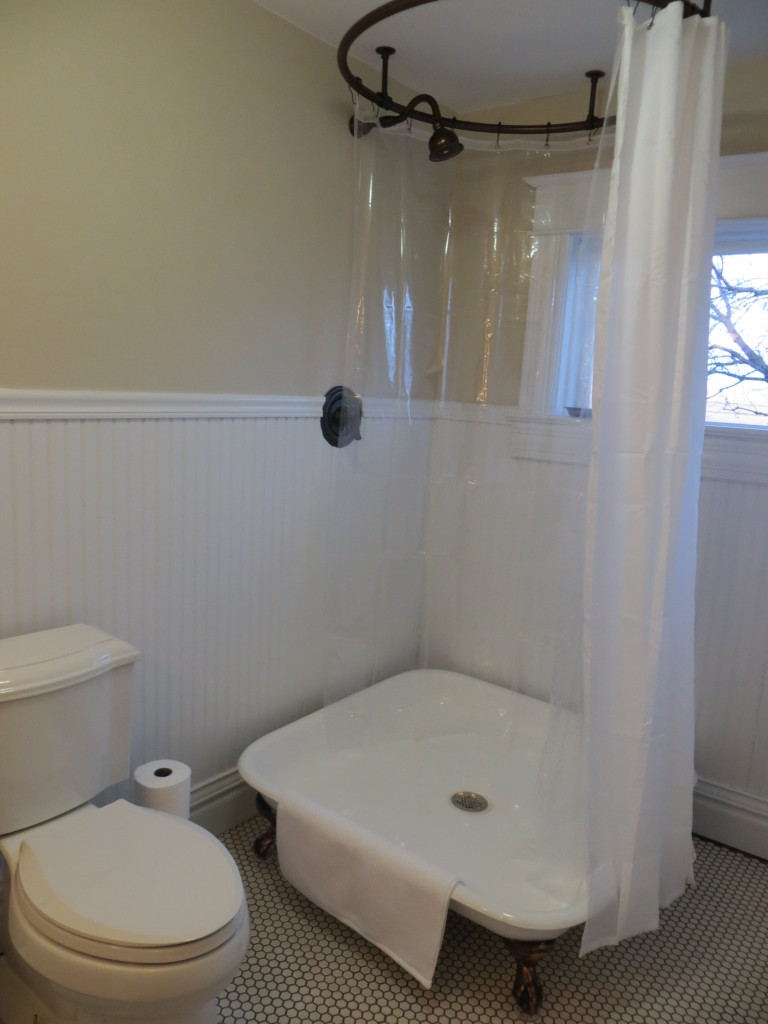
Clawfoot shower!

Yep, a clawfoot shower!  I’ve always wanted one and was super excited to have the chance to get one with this restoration.  We did shut off the extra door.  It connected to a room that was probably once a bedroom, but we are using it as a breakfast room and it made more sense to have the shower in the corner.  I got this at www.signaturehardware.com, but I don’t see it on their site anymore.  I’m sure you can still get them elsewhere, but apparently not there anymore!

It’s great to have two working bathrooms in the house.  I’m glad we didn’t decide to just seal this one off!

Entry into bathroom before and after

Shower area before and after


Posted in Bathroom 1, Before and After | 4 Comments

Before and After-The kitchen

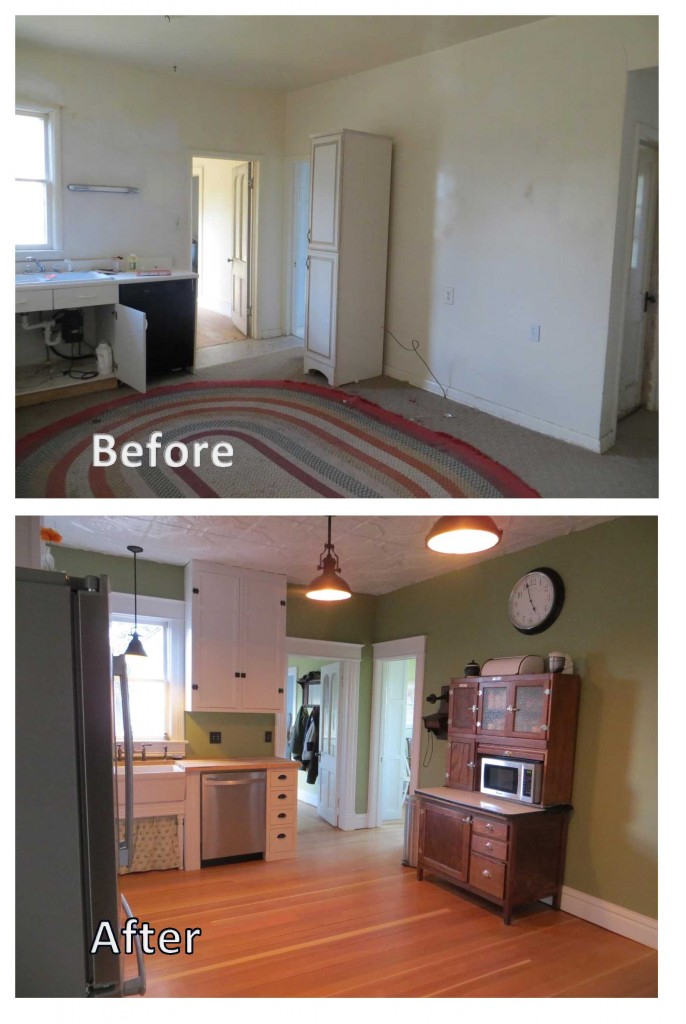
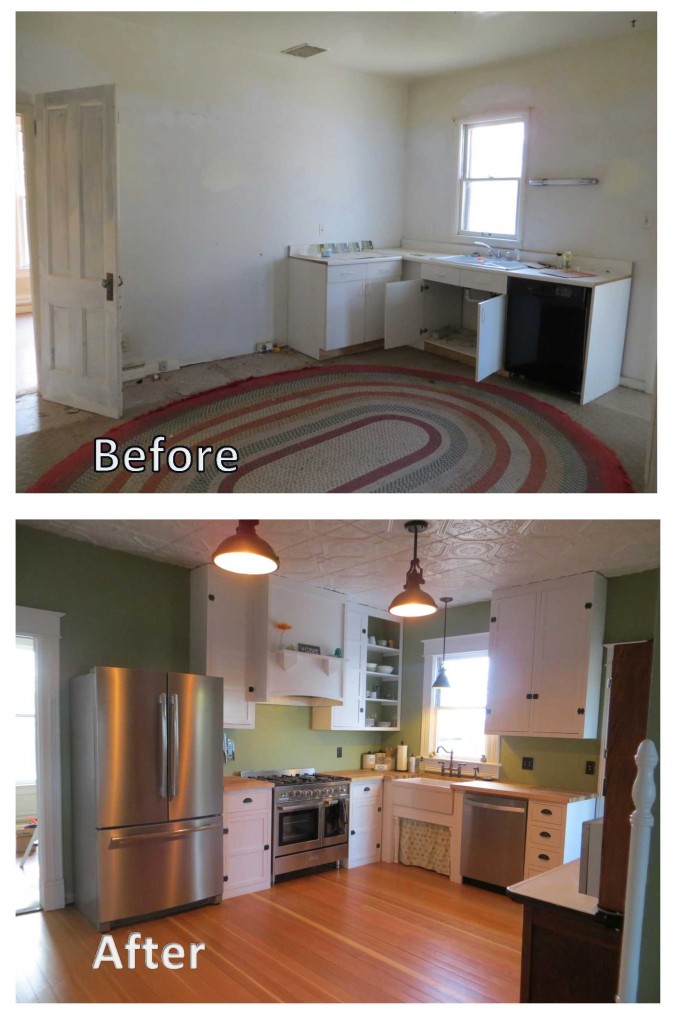
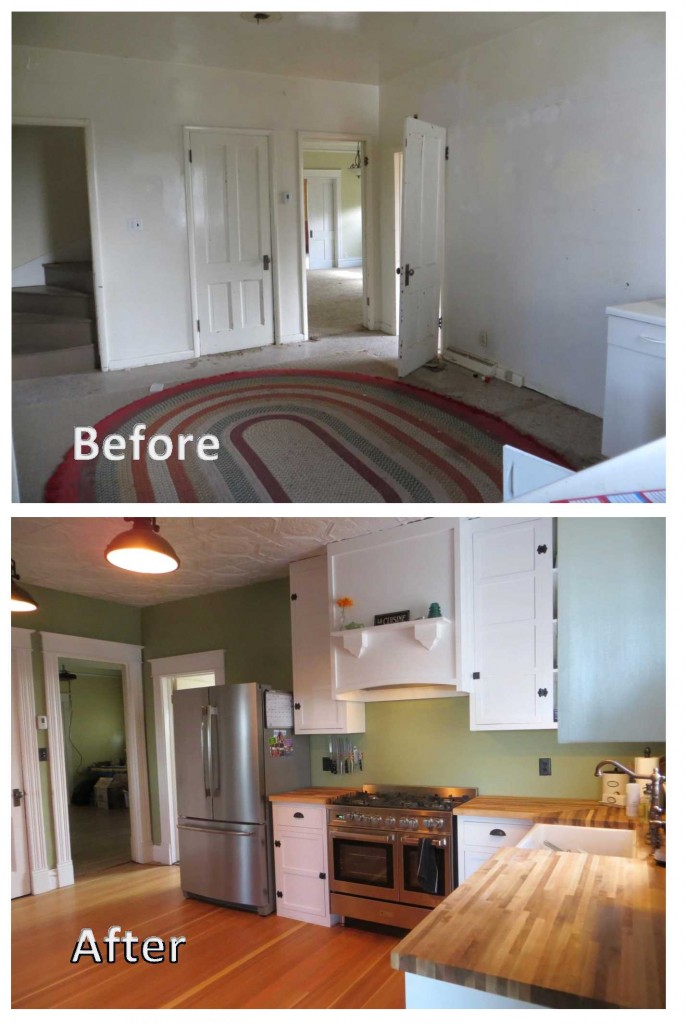
We have been using the kitchen since we moved in and had completed most of the work in October.  I revealed the range and the sink in prior posts, but I haven’t shared the full before-and-after because we were missing one major detail….cabinet doors.  I do find it kind of funny how many people thought it was complete when they came over.

Well, I can happily say that it is now 95% complete.  (Is anything ever 100% complete in an old house?)

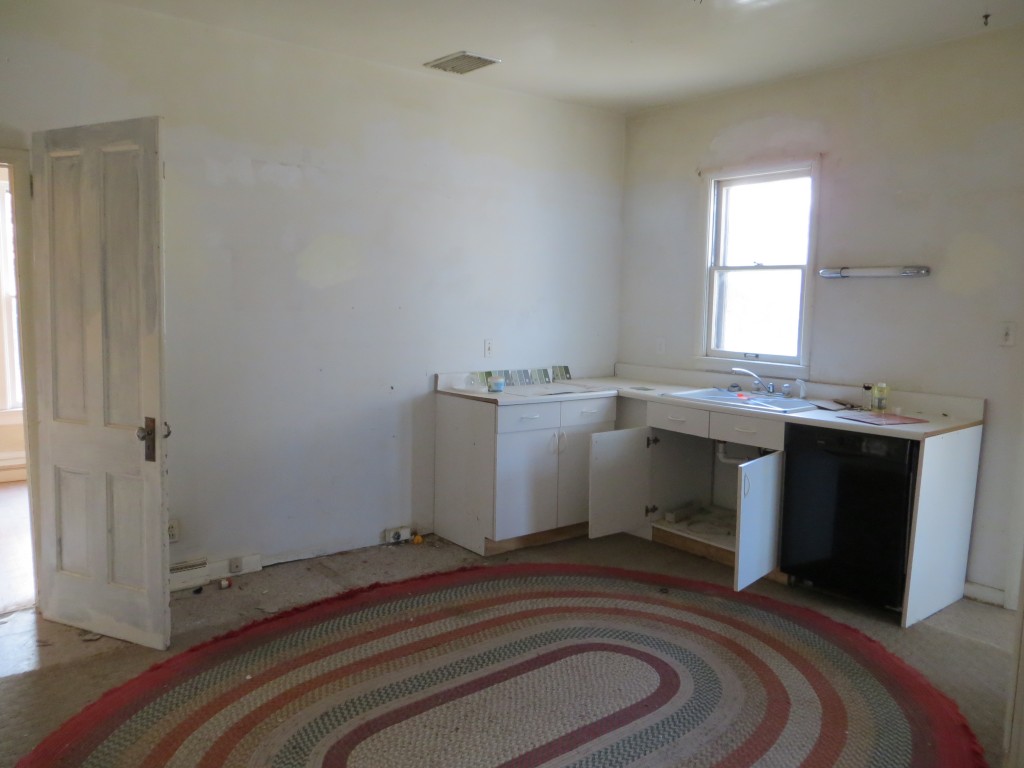
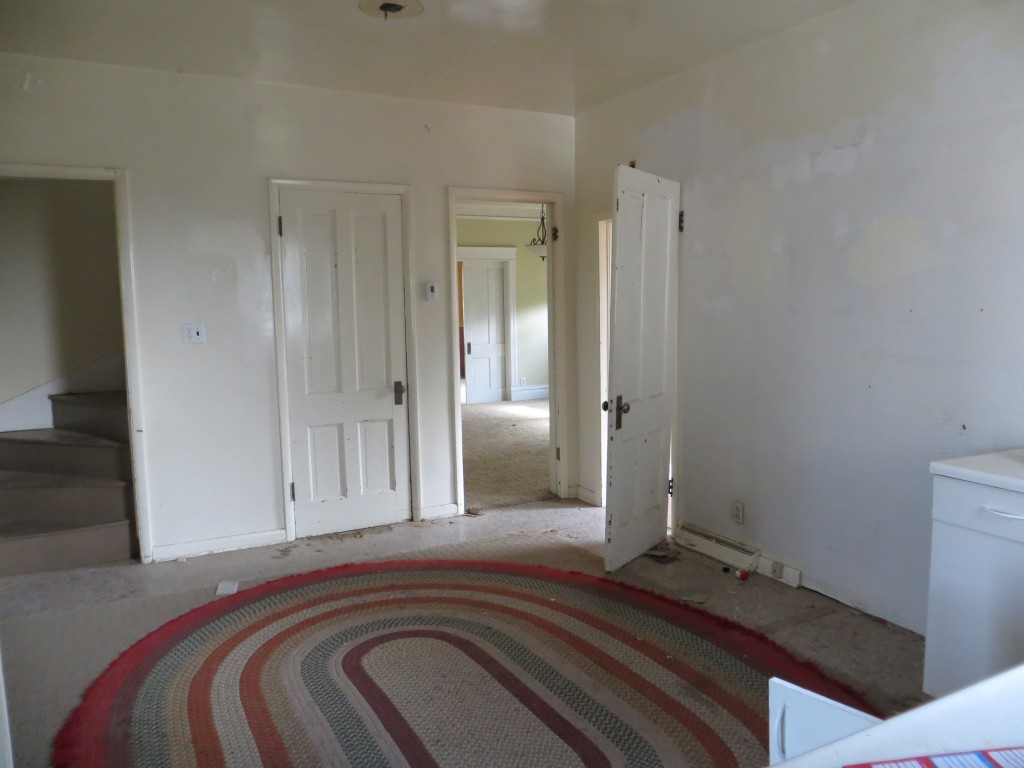
Here is the kitchen before:

Before Kitchen North View

Before Kitchen South View

As you can see, there were virtually no cabinets, no appliances, the floor was in rough shape, and all the trim had all been replaced.  What you can’t see is how “spongy” the floor felt.  Every time you walked through the room, the cabinet doors would clatter from the floor moving.  A bit disconcerting to be sure.

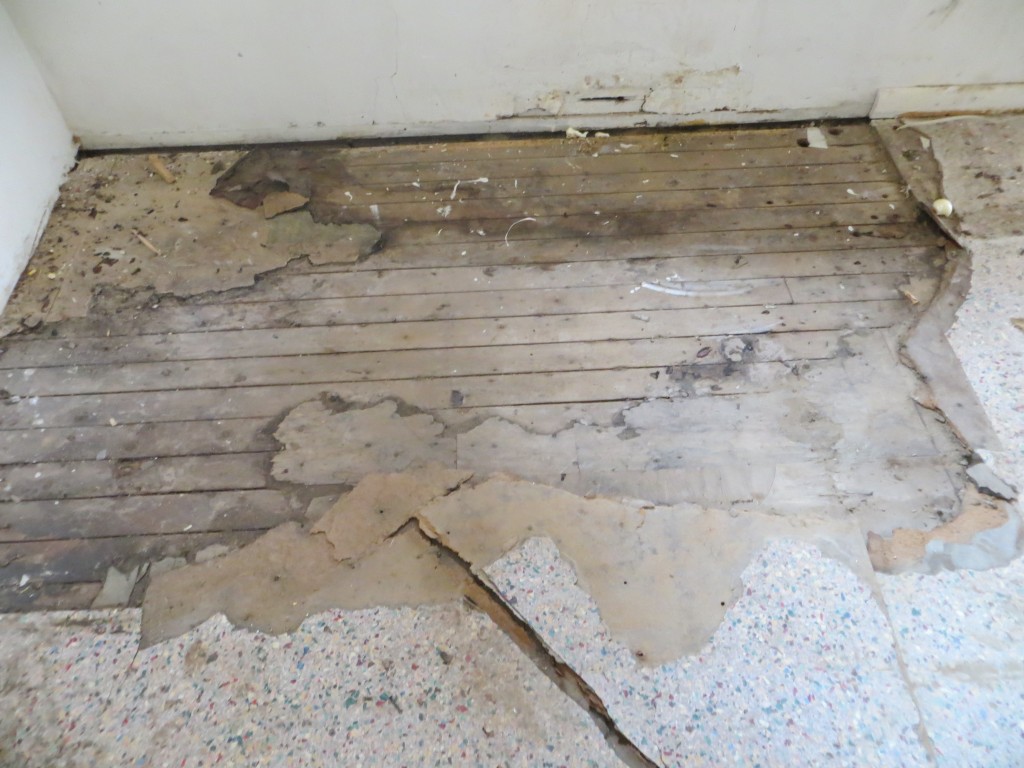
Before repairing the spongy floor, we wanted to see how careful we had to be with the original floors.  We would always rather save the original floors, but unfortunately we could not in this case.   The hardwoods under the linoleum were just too far gone.  They were stained and damaged beyond repair.

Damaged old kitchen floor.

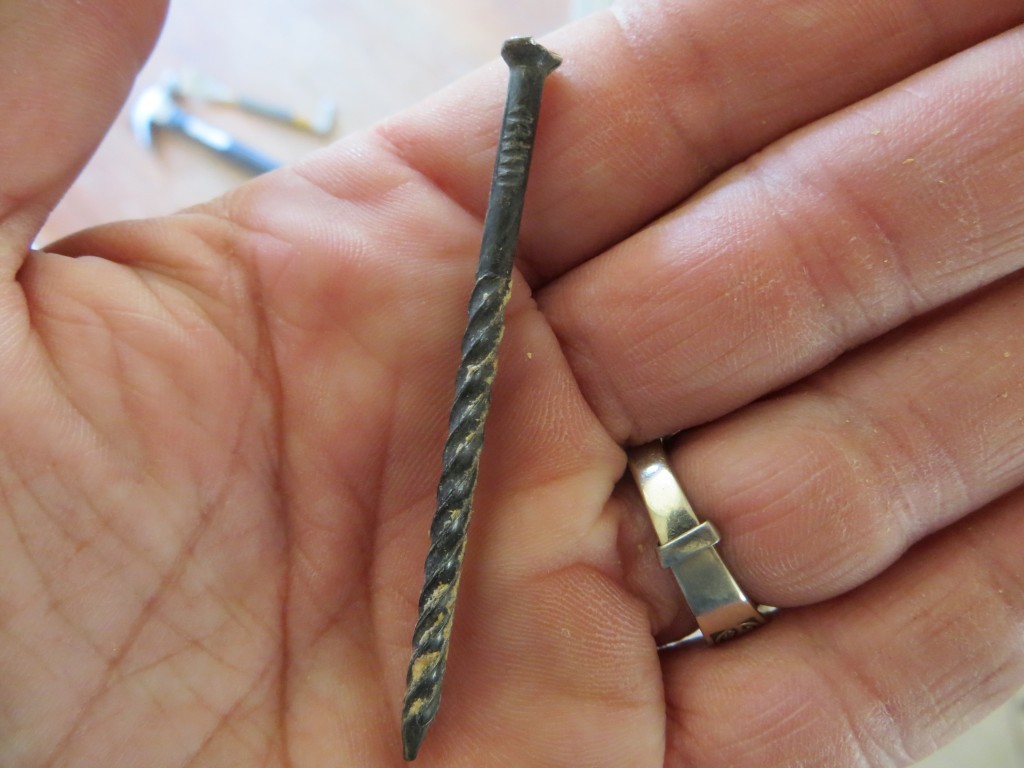
And they smelled…bad…who knows of what.  So, up came the linoleum and the hardwood floors.  No easy task when the hardwoods were nailed down with these:

The reason we are all up to date on our tetanus shots.

After the floors came up, we had to sure up the floor.  To do this, we had to run a 25 ft. microlam board all the way under the house and jack it up with floor jacks.  The floor jacks were then cemented into caisons.

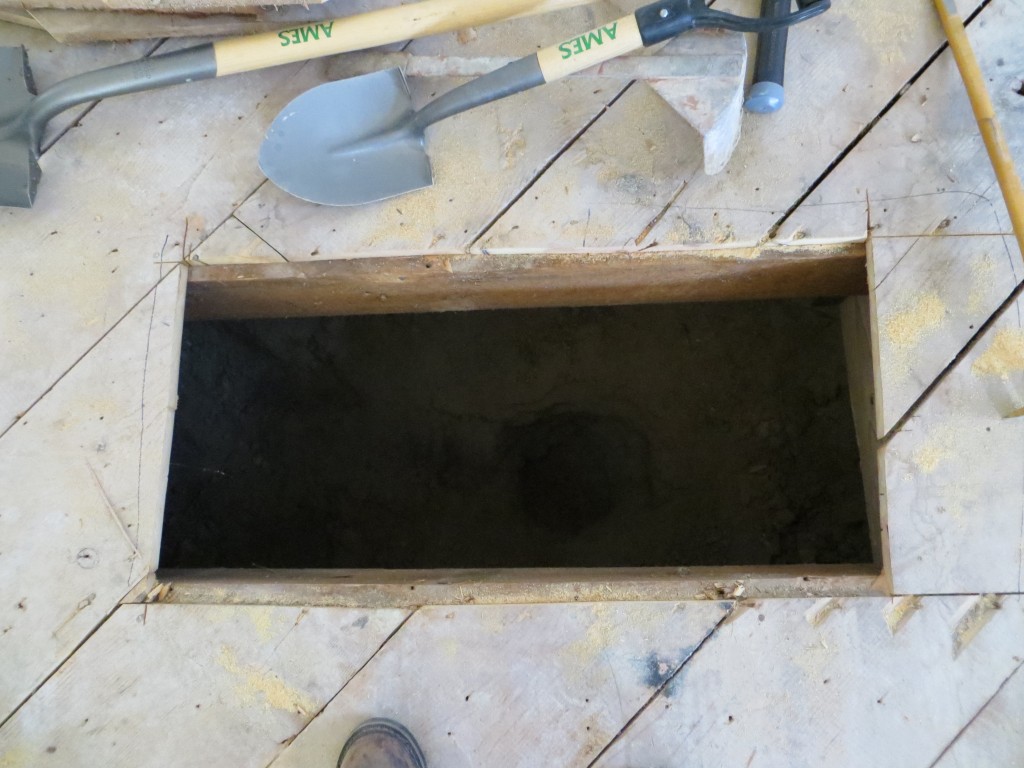
Here, you can see the hole we cut into the kitchen sub floor so we could pour the cement into the caison for the floor jack.  It was fun to watch the big men wiggle in and out of this hole to dig the hole in the ground and set the floor jack.  Cheap entertainment.

Hole in the floor for the cement pour.

I won’t bore you with all the details, but here is what we ended up doing when it was all said and done:

  • Remove linoleum and hardwood flooring
  • Repair sagging floor
  • Rewire and replumb everything
  • Remove the 1950’s style trim and replace with custom milled trim to match the original trim in the house.
  • Patch the plaster
  • Install the tin ceiling
  • Paint
  • Have flooring custom milled and installed to match the original flooring in the house.
  • Install new gas line for the range
  • Install all new appliances
  • Build and install all cabinets – hubby built all the cabinets!

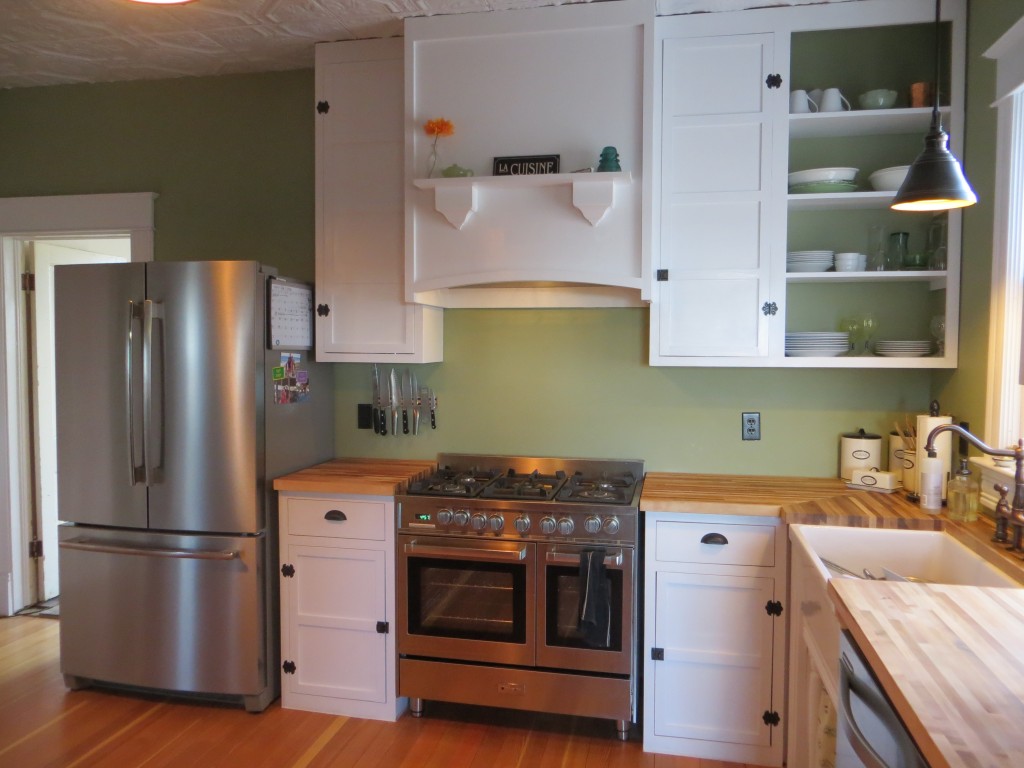
So, without further adieu….here are the afters:

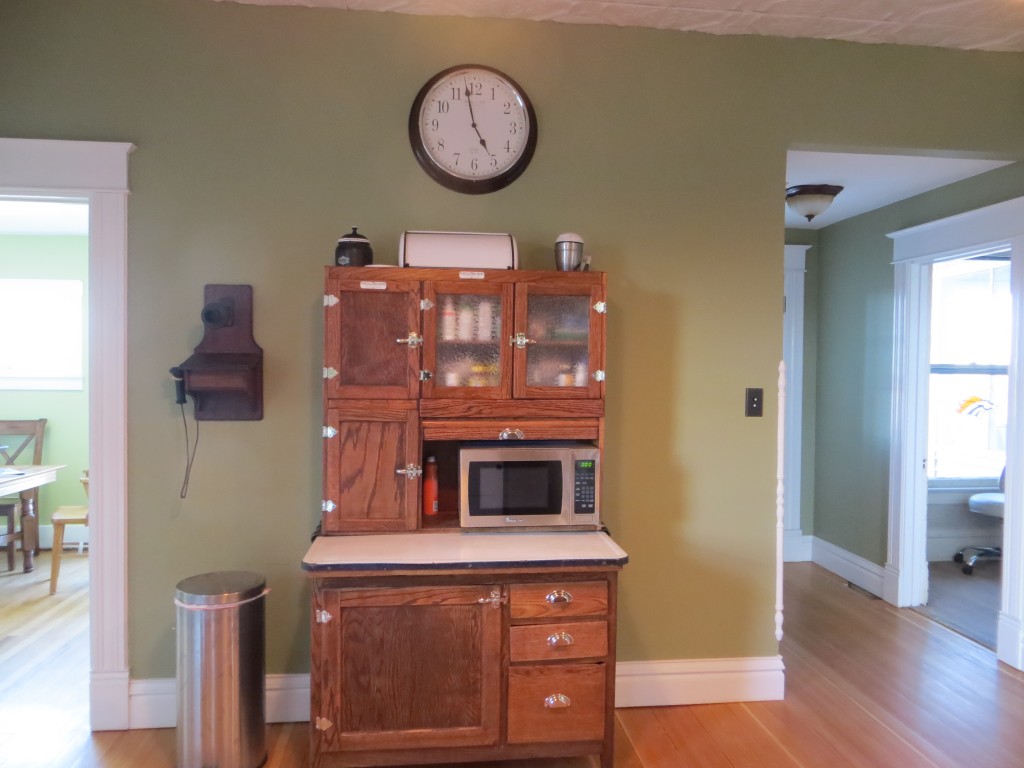
West wall

Hoosier cabinet we found on Craigslist and antique phone we found at an antique store.

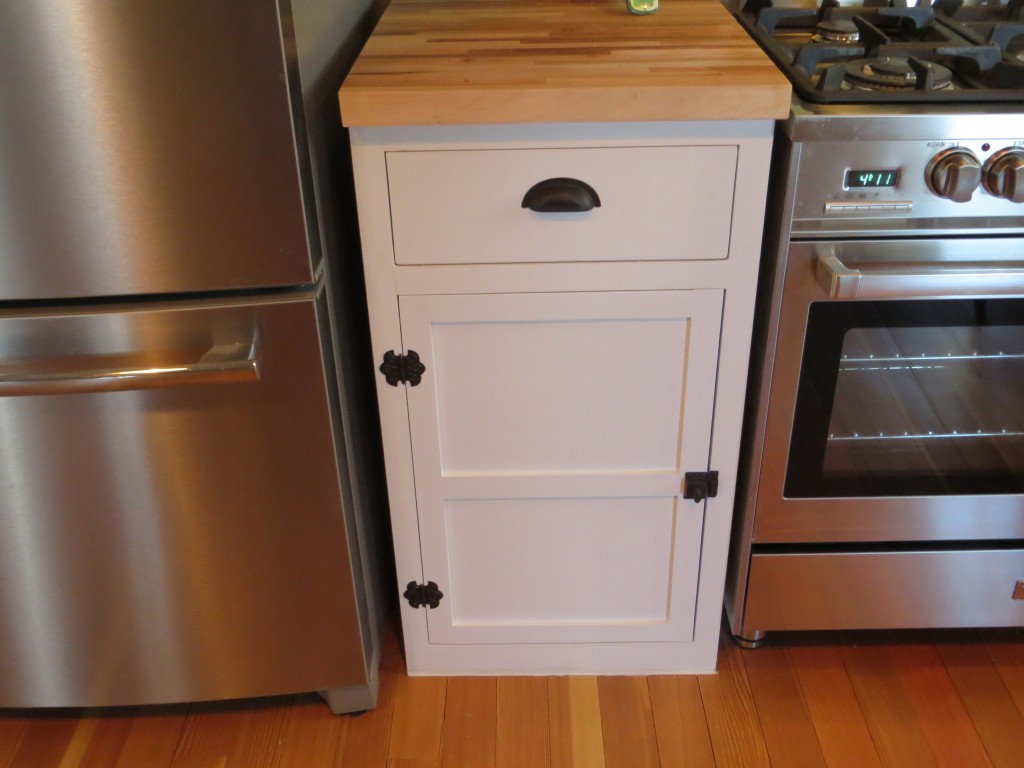
Here are the cabinets that hubby made.  Didn’t he do an awesome job?  It only took 5 months to get them done, but totally worth it.  And we probably saved $20,000 by building them ourselves.

Custom cabinetry made by the hubby!

And here are the side by sides:

North East view

North West view

South West view

So, there you go!  Still lots to do (like most of the rest of the house), but at least I can cook in a beautiful space!  And, living too far out of town for pizza delivery means I better cook!

We still plan on doing some trim work, will add a backsplash behind the range, and will eventually build the refrigerator into a cabinet, but for now we are done!

Posted in Before and After, Kitchen | 14 Comments

Before and After – The boy’s room

We decided the kids needed their rooms done next. We thought they deserved to get their rooms finished so they could enjoy them while we work on the rest of the house.

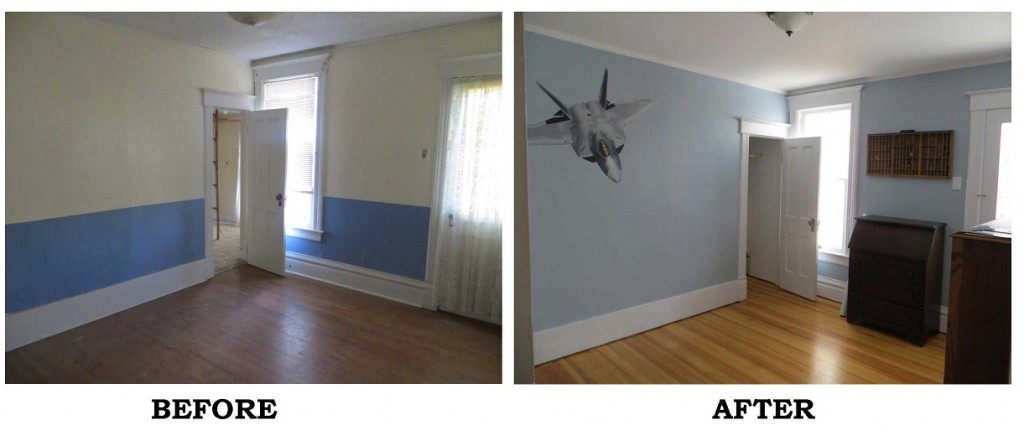
Youngest has the smaller room, but it’s still pretty cool.  He has a porch just outside his room that actually sits on the roof.  His room wasn’t in too bad of shape.  The walls had a thick texture on them as did the ceiling, the floors needed to be refinished, and the porch needs a railing put up, but all in all not too bad.  Here’s a before pic:
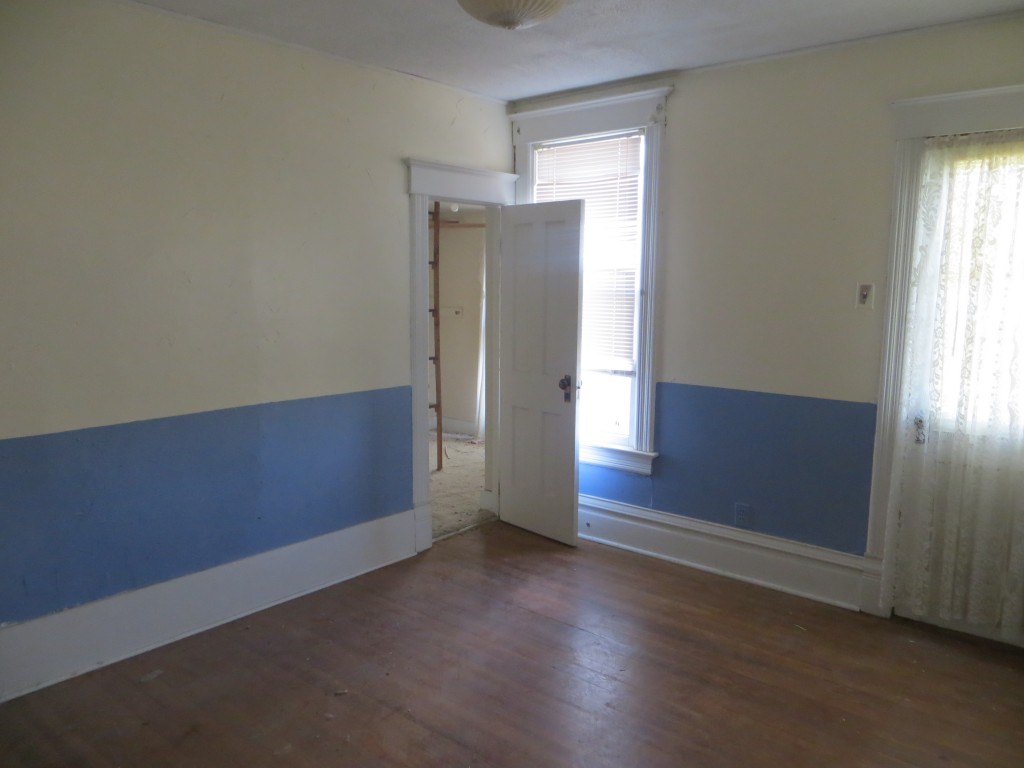
Youngest’s bedroom before

Here’s the porch on the roof:
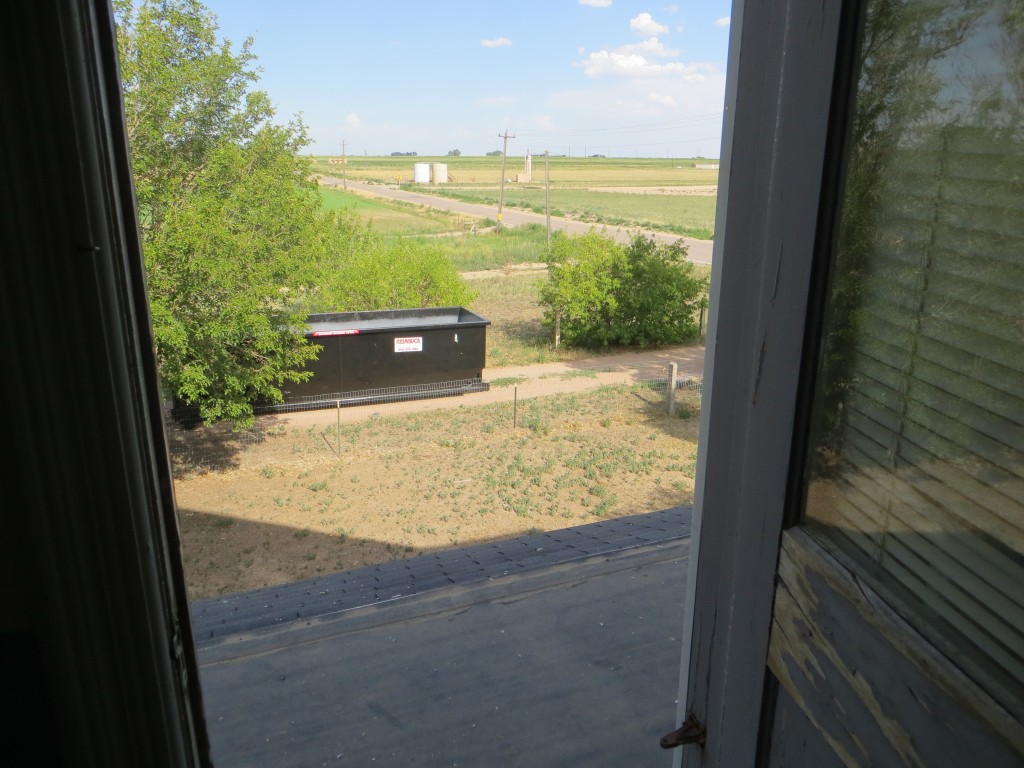
Bedroom porch before

He also had a large closet that was added to the house at some point.  Our best guess was that this room was originally a pretty large bedroom and that the bathroom didn’t exist upstairs at all.  When they put the bathroom in, they cut into this room and added on the closet.  At least, that’s what we think happened.  There are many mysteries in old houses!

The closet, though large, was not very usable and didn’t fit the outside of the house.  Here’s what it looked like from the outside:
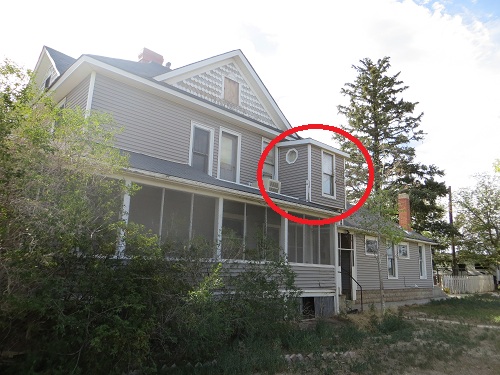
Closet “pop out” outside view.

We have been trying to research the house and find some pictures of the house so we can re-do the outside with some historical accuracy.  The best picture I can find so far comes from the County Property Card and it is this big:

Property Card image

Helpful, huh?  After zooming in…a lot…we can see that the “pop out” isn’t there in the photo, so we feel okay about removing the enlarged closet and the pop out.  Yes, I did say that we are actually making a closet smaller.  Crazy-pants, I know.  Here’s what the closet looked like when we bought the house:
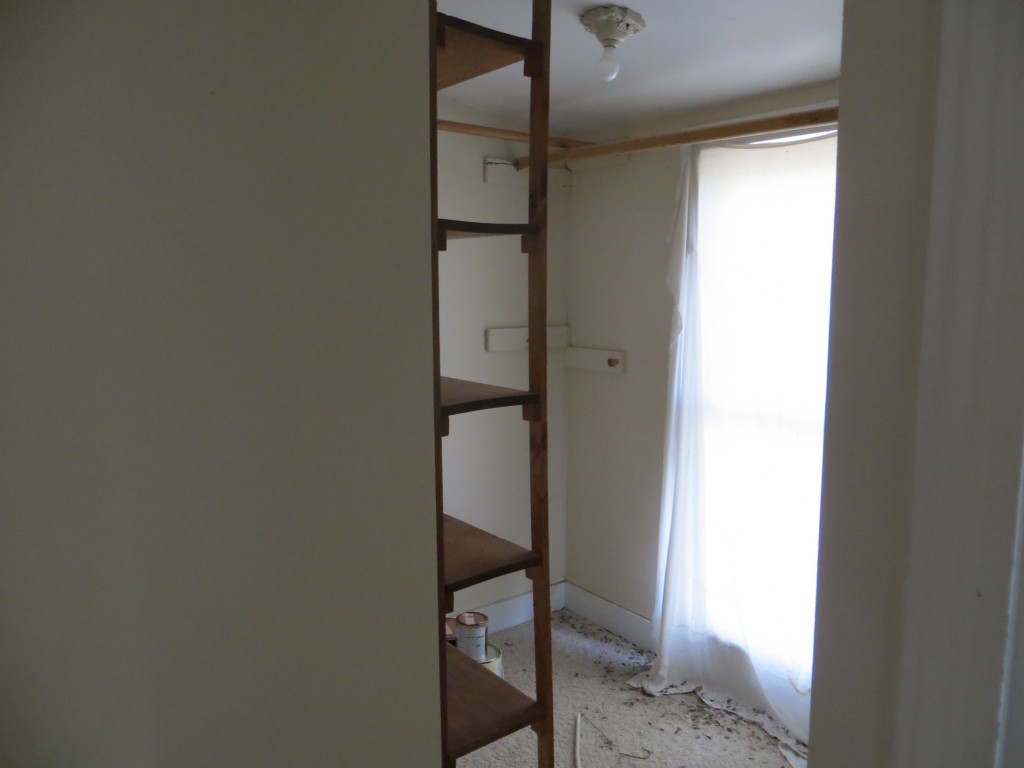
Large closet before…

And, here it is after we walled it in:
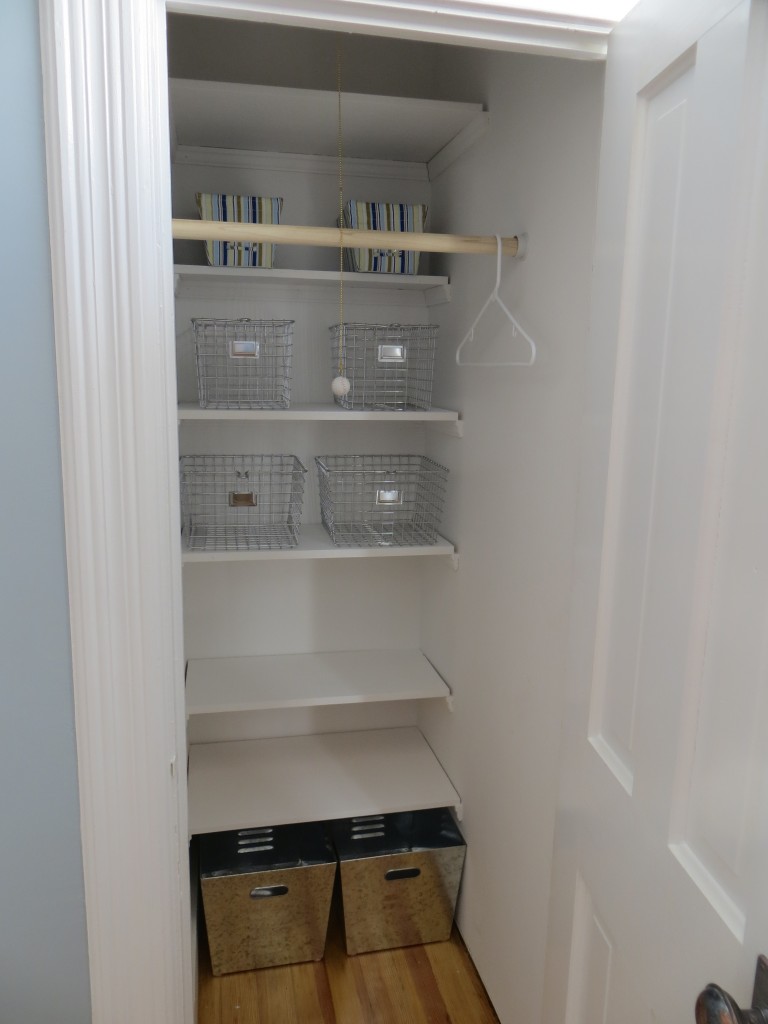
Big closet made smaller…but still usable!

It’s pretty deep, so we were able to put shelving all the way in the back and still have room for the rod up front.  It looks so nice, now doesn’t it?  Wait till it’s full of Transformers and Legos, and trucks, and action figures, and other boy stuff.

Because we made the closet so much smaller and the room isn’t very big, we had to get creative with storage.  Off to the antique store we went!  We found this cool cabinet, called a “gentleman’s dresser”:
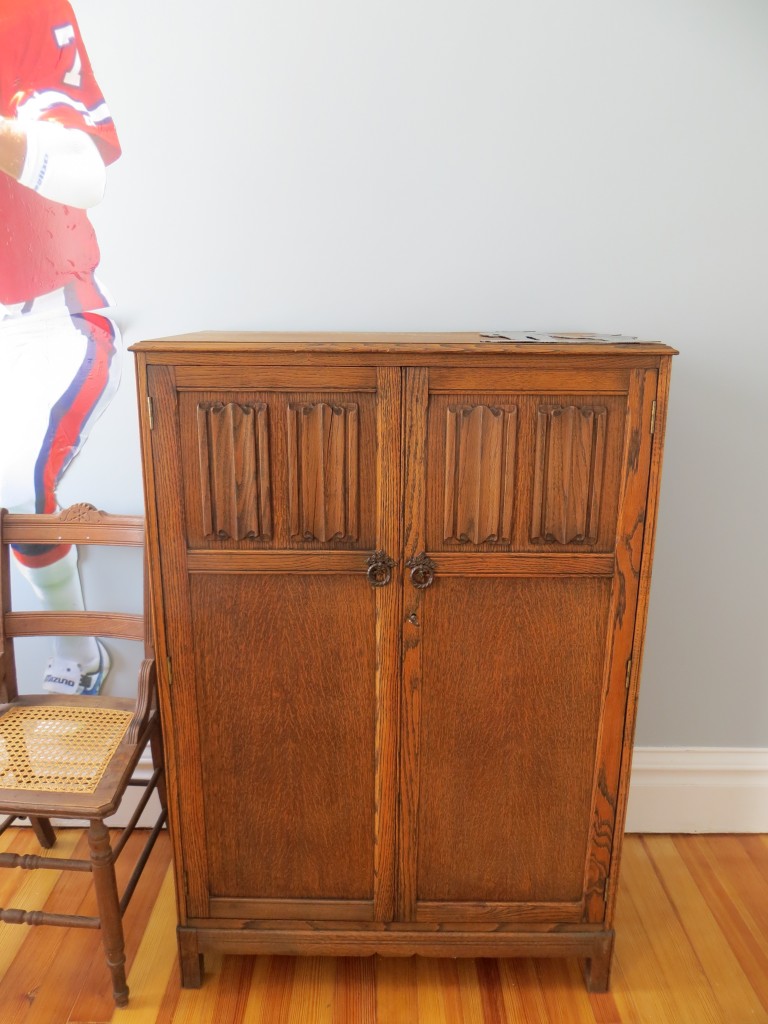
Gentlemen’s Dresser

The best part is the shelving inside:
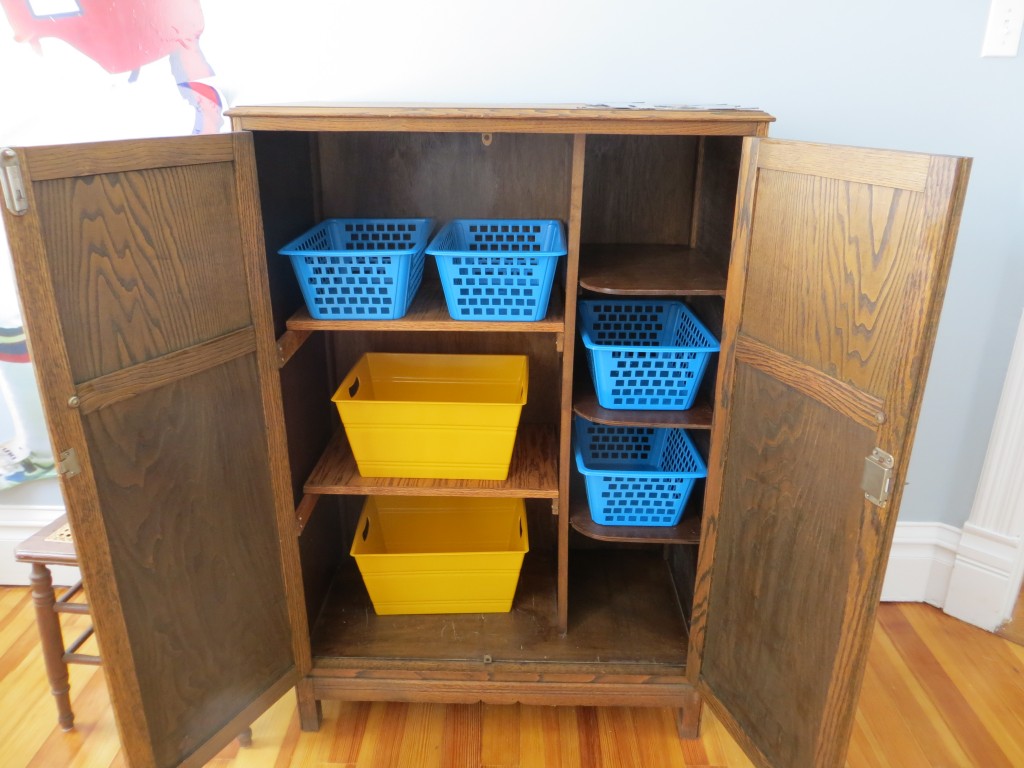
Inside of dresser

Pretty cool little piece of furniture, huh?  We also found a desk that fits perfectly in the small space between the window and door with storage in the drawers:
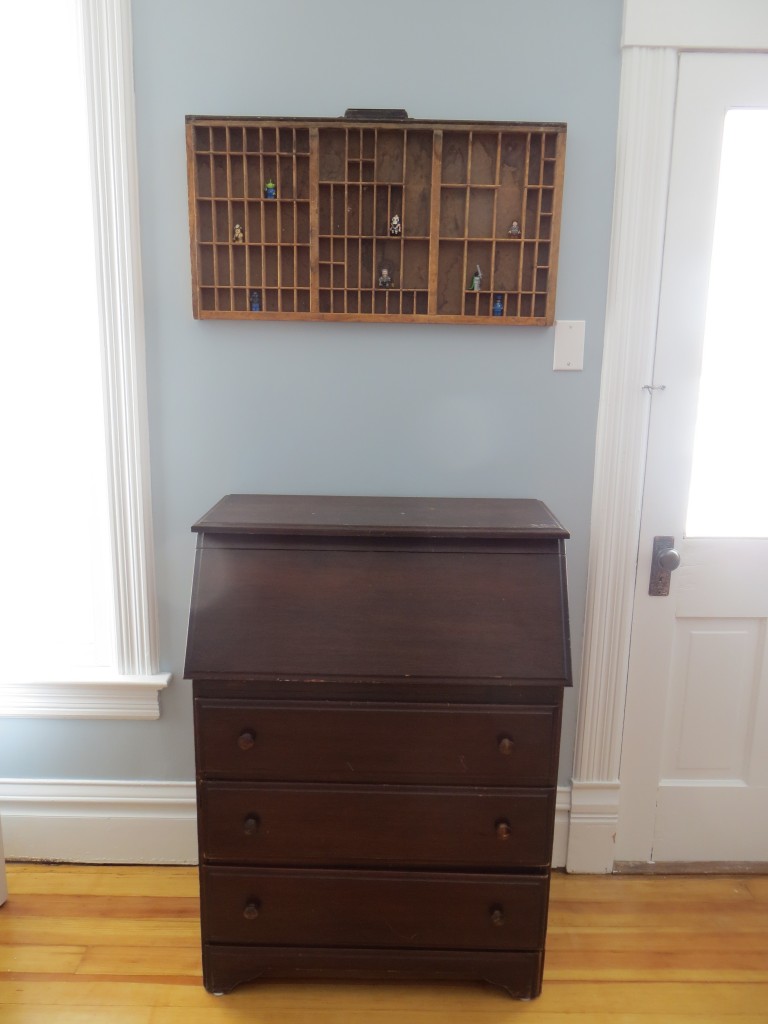
Desk and printer’s drawer

Above the desk is an old printer’s drawer that was used to store the letters printers would use when printing presses.  We are using it for Lego minifigures!
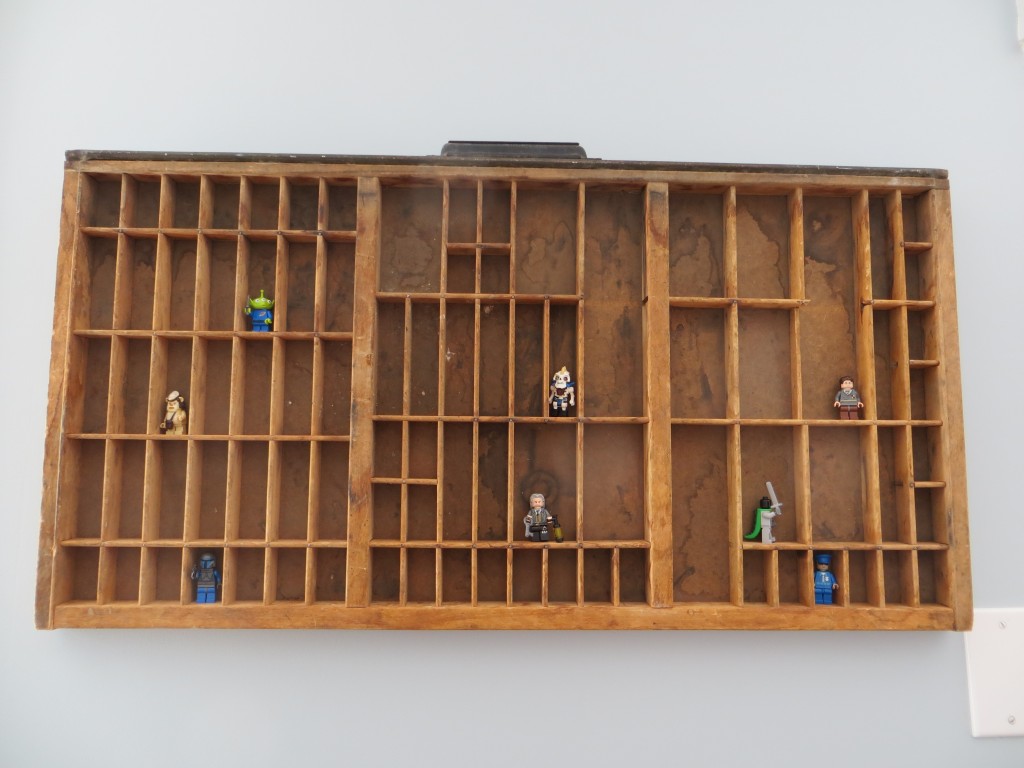
Printer drawer made Lego storage!

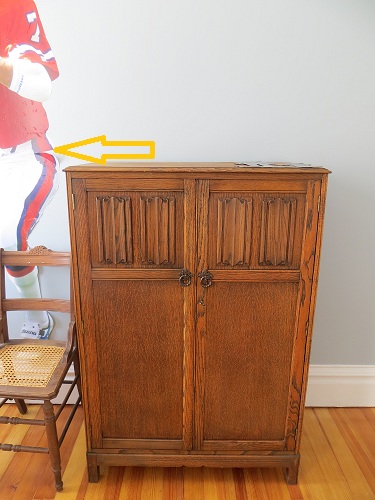
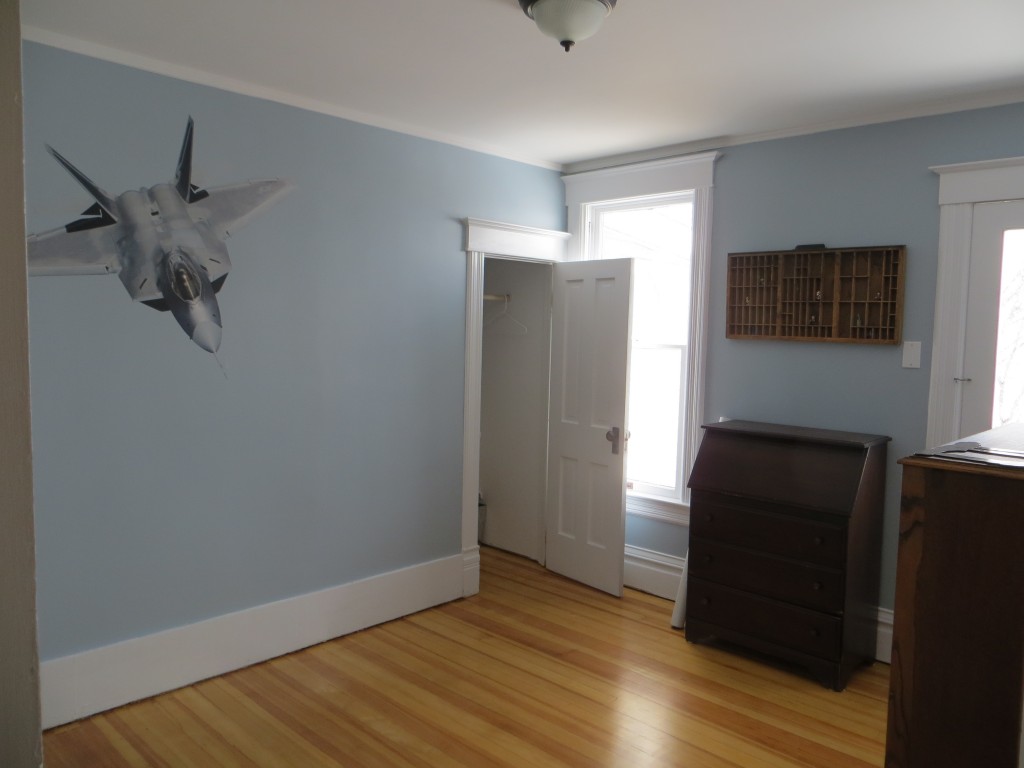
Since this is a 9 year old’s room, we didn’t want it to be a museum.  We wanted it to fit the age of the home, but we want him to be able to enjoy it, too.  His favorite airplane is an F-22, so we got a Fathead up on the wall for him.  We had a John Elway Fathead that we removed from the other house and tried to put up here (you can kind of see it in the picture of the gentlemen’s dresser), but it didn’t go so well.  We wanted it to be functional with clean lines and a good balance of old and new.  I think it looks pretty cool!
Bedroom before and after
 

Posted in Bedroom 1, Before and After | 6 Comments

This one’s….not for John

We are Denver Bronco fans.  It even affects how we choose projects around the house sometimes.  We unabashedly brainwash our kids with the orange and blue.  John Elway is king and Sundays are planned around football games.

In our old house, we had a Fathead up in our son’s room of John Elway.  It was so cool, larger than life and in your face.  It was from back in the day, Johnny boy looked young and ready to win some Super Bowls.  When we moved, I went to Fathead’s web site and followed their instructions for moving Mr. Elway.  I carefully put him on a shower curtain, rolled him around a tube, and made sure he stayed safe and un-crunched in the move.

Once we got the youngest’s room done, we were excited to get John in his rightful place on the wall.  When we started unrolling him, we had an impending sense of doom.  Johnny didn’t look so good.  His young face was wrinkly, his uniform looked as if it had gone through war.  Still, we hoped….

We got him up on the wall and thought that maybe a hairdryer would warm the decal and it would lay on the wall happily.  Initially, it was looking pretty good.  Wrinkles were laying down, bubbles were easily sliding out the edges….we thought maybe, just maybe Johnny boy was going to “stick” around (see what I did there?  Haha).  We joked that we would come in in the morning and he would be all crumpled on the floor.

Well, crumpled on the floor he was not, but I would not say he was in good condition either.  I will spare you the agony of looking at a wrinkled John Elway Fathead….it’s really quite sad.  You can see a little edge of him here:

Poor peeling Johnny

*That cool piece of furniture is a gentleman’s dresser.  We found it at an antique store.  It’s cool, huh?*

Needless to say, Johnny had to come down.  There was a dirty mark around where he was on the wall from our grubby fingers trying to mash the sticker on the wall, but all other traces of him are gone.  Worse is that Fathead no longer has a John Elway graphic available to purchase.  Sad day.

Here’s his replacement:

F-22

Not too bad!

Posted in Meanderings | 2 Comments

Ashes to ashes

The other day started as an ordinary day.  It had snowed the night before and there was an inch or so on the ground, but it was calm and sunny out.  Hubby was putts-ing around while I got the kids ready for school.  He came in smelling of campfire and announced “Okay, I’ve started a bonfire.  Going to get some guys out to help me tear down part of that old house today.  After you drop off the kids, you’ll need to come watch the bonfire.”

Well allrightythen…

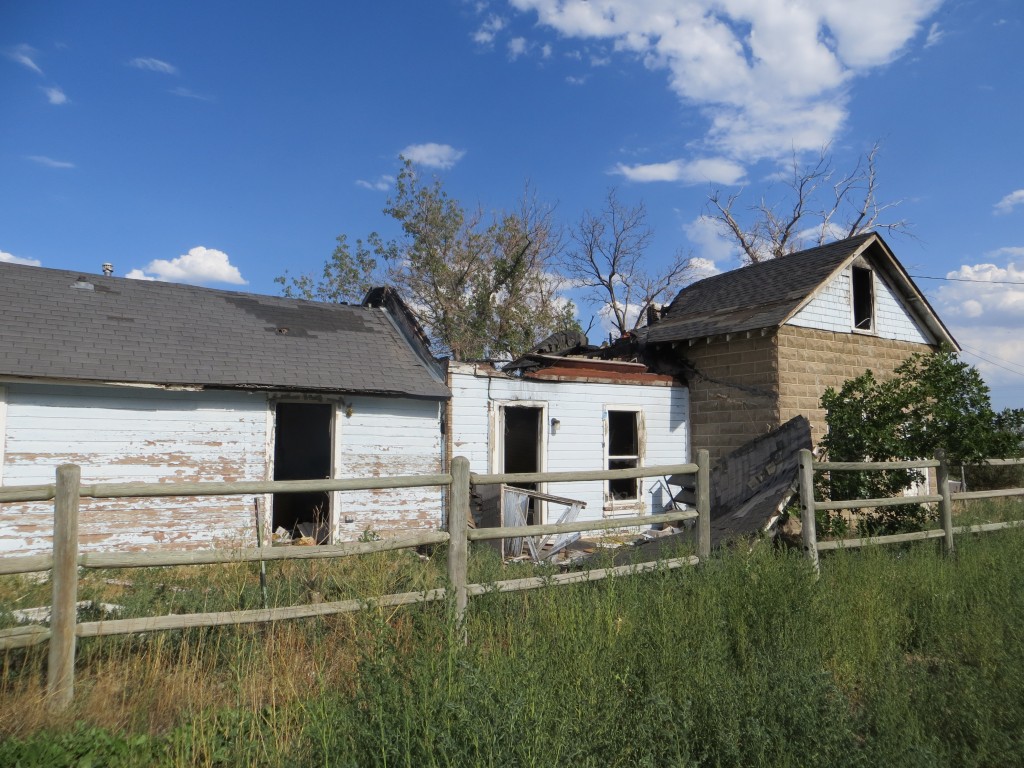
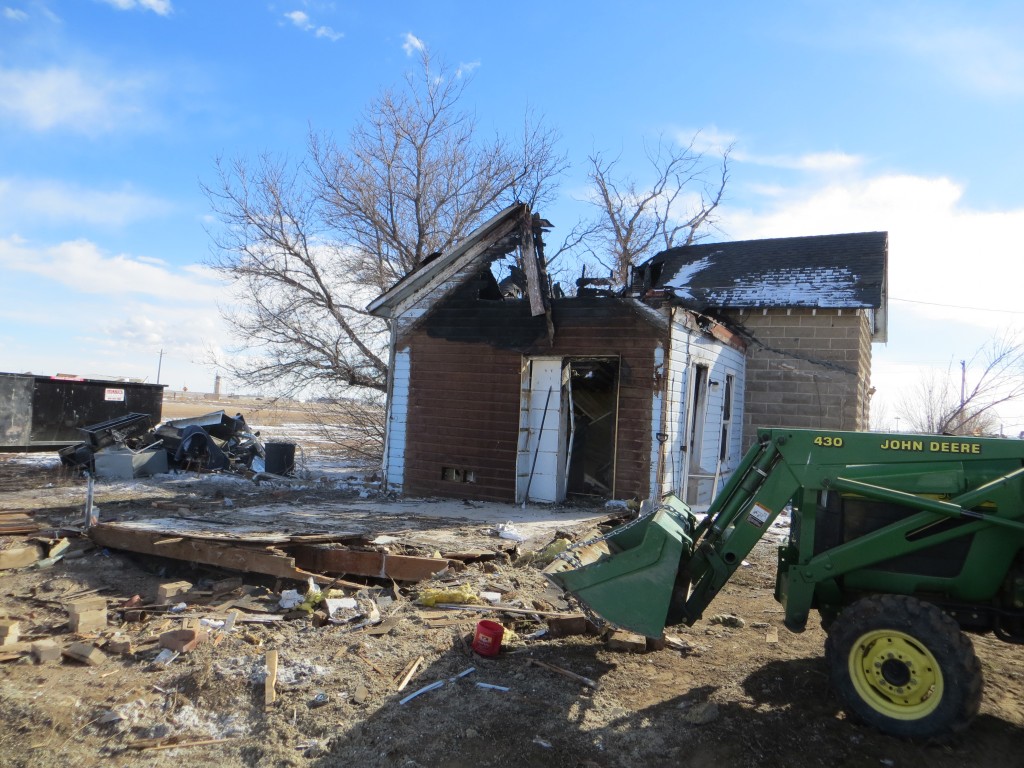
We’ve talked about how we were going to tear down the old house, but I didn’t really expect it to happen that day!  For those of you who don’t know, this property had two houses on it.  The main house and an old helping hand house which had been rented out by former owners.  In Jan. 2011, the former owner was in the helping hand house thawing out pipes with a blow torch(!) and burned it out.

Burned out helping hand house

We want to keep the front stone structure and possibly turn it in to a bar or something, but for now, we need to tear down the old structure and dispose of it.  After about 4 hours of hard labor, two huge roll away dumpsters, and 8 hours of burning….we got it to this:

1/3 of the old house gone!

I’d never babysat a bon fire before.  Sure, I’d gone camping and had camp fires, but this was a working fire.  A fire with purpose.  A “where-there-is-great-fire-comes-great-responsibility”-type fire…   Add that to living in an area where it is not uncommon for a “trash fire” to become a “the entire county is now on fire” and there is a little bit of stress involved.  I did NOT want to be the city-slicker turned cowgirl who made the news because of my idiocy.

It’s funny the things that go through your head when you babysit a fire for a long period of time.  I kept worrying about falling into the fire.  Every song with the word “fire” in the lyrics ran through my head.  I over-analyzed the sound of the fire and the way different things sounded when they burned.  I was amazed at the color of the fire and the way things looked when they burned.  Then I worried I was becoming a pyromaniac.

I had to leave mid-afternoon to get the kids from school.  I left hubby in charge of my fire.  Yes I said “my” fire….we had gotten quite close at that point…don’t judge…  Anyway, when I returned, he had put one of the guys who was helping tear down the house in charge of the fire and this guy….this guy was picking up the ashes with a shovel and TOSSING THEM IN THE AIR!!!  By then a breeze had started, so these ashes were scattering everywhere….floating over to the barn, the main house, the extremely dry fields all around….everywhere!  *forehead slap!*

Guess we can’t all appreciate the power and responsibility of a great fire.  The kids can just skip school the next time Hubby gets a wild hair and starts tearing down structures and starting bonfires!

Posted in Before and After, Meanderings, Outside | 2 Comments

Barn Straightening – Phase One

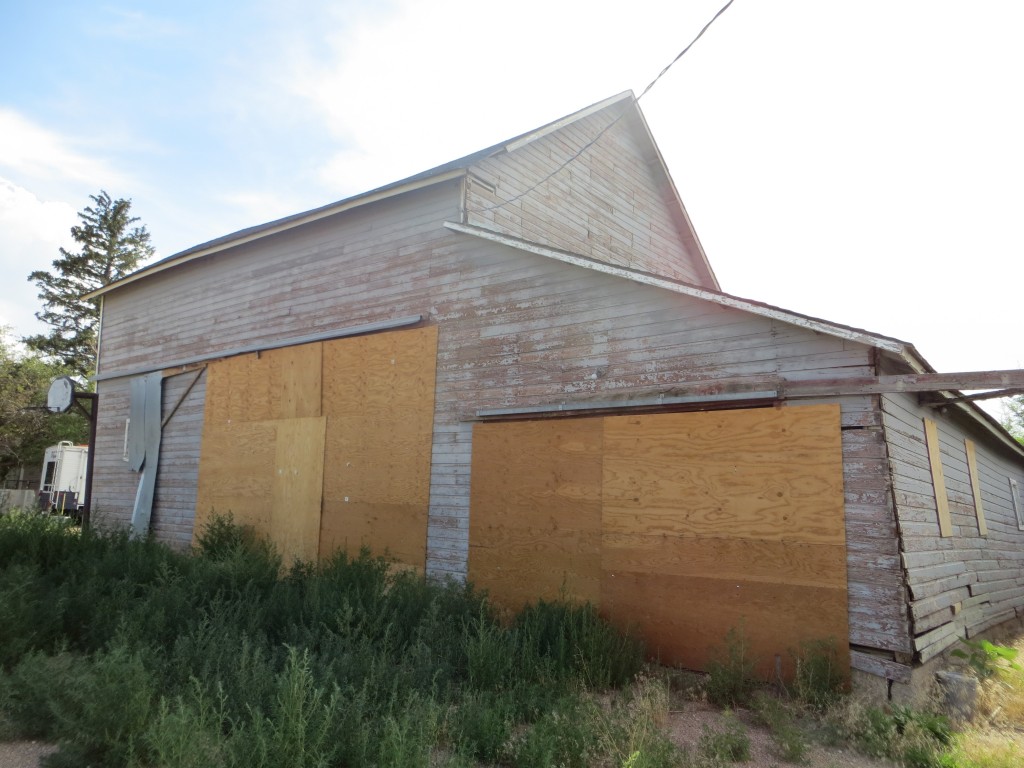
This house has a big old barn on the property that is likely as old as the house.  The only problem is the barn leans badly and appears as if it is ready to topple over at any moment. Every time we have a gusty day, I worry that I’ll walk out to find the barn has become a pile of wood and nails.

The leaning barn all boarded up

As you can see, the former owner boarded up the doors and windows to keep people out because it just isn’t safe.

We really want to save the barn and restore it to its former glory.  This is not a top priority in the grand scheme of things…considering everything that needs to happen in the house…  However, we were feeling that if we didn’t do something to sure up the structure, we would lose the barn forever.  The project would go from a restoration project (mostly in our control) to a clean up project (emergency project).

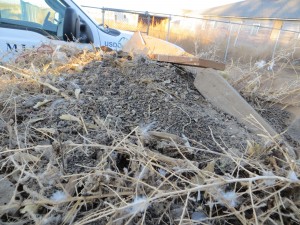
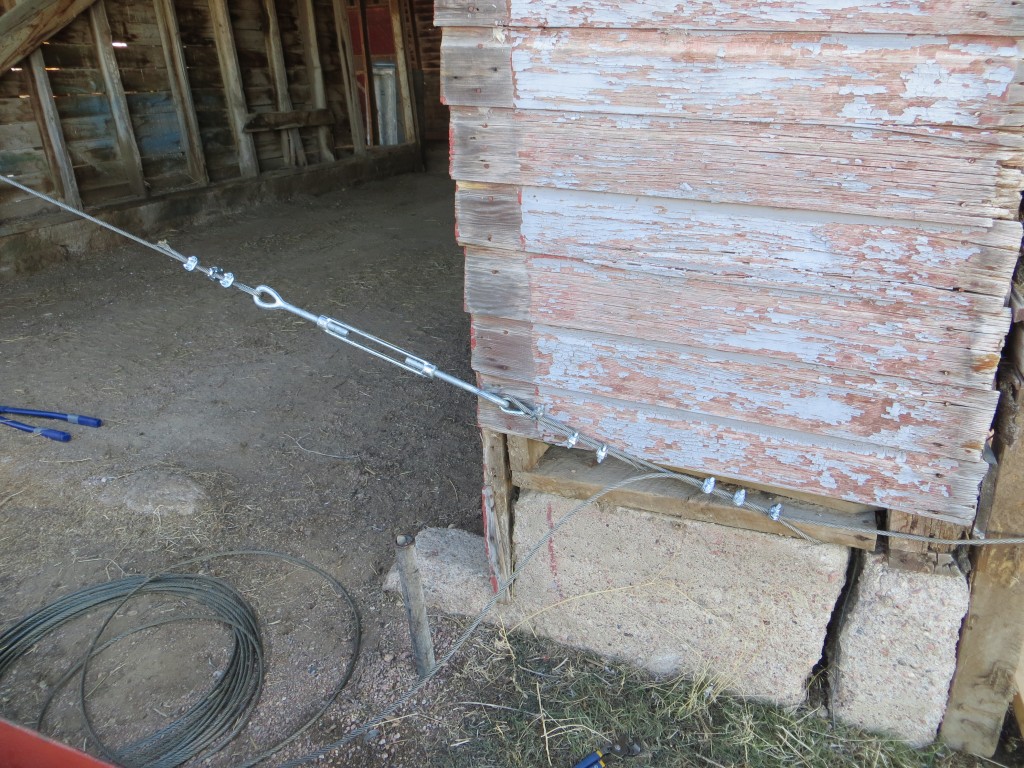
So…this weekend, we cleaned out the barn and attached cables to stabilize the structure.  There weren’t any fun surprises when we cleaned everything out.  Nothing worth saving… No cool piece of furniture unearthed, no cool classic car hidden under the debris.  What we did find was shit.  Lots and lots of shit.  Literal shit.  We found cow shit, horse shit, rabbit shit, pigeon shit, mouse shit, cat shit, bat shit, unidentified mammal (alpaca?) shit…and maybe even a pile of human shit.  Pounds and pounds of it.  It was really quite impressive how much poo we found.  The variety itself was amazing.  The quantity was truly unreal.

Pigeon Poo on the barn floor.

More pigeon poo

Bat poo pile

I can’t imagine how many years’ worth of poo we cleaned up, but it was truly the most disgusting thing we’ve done….so far.

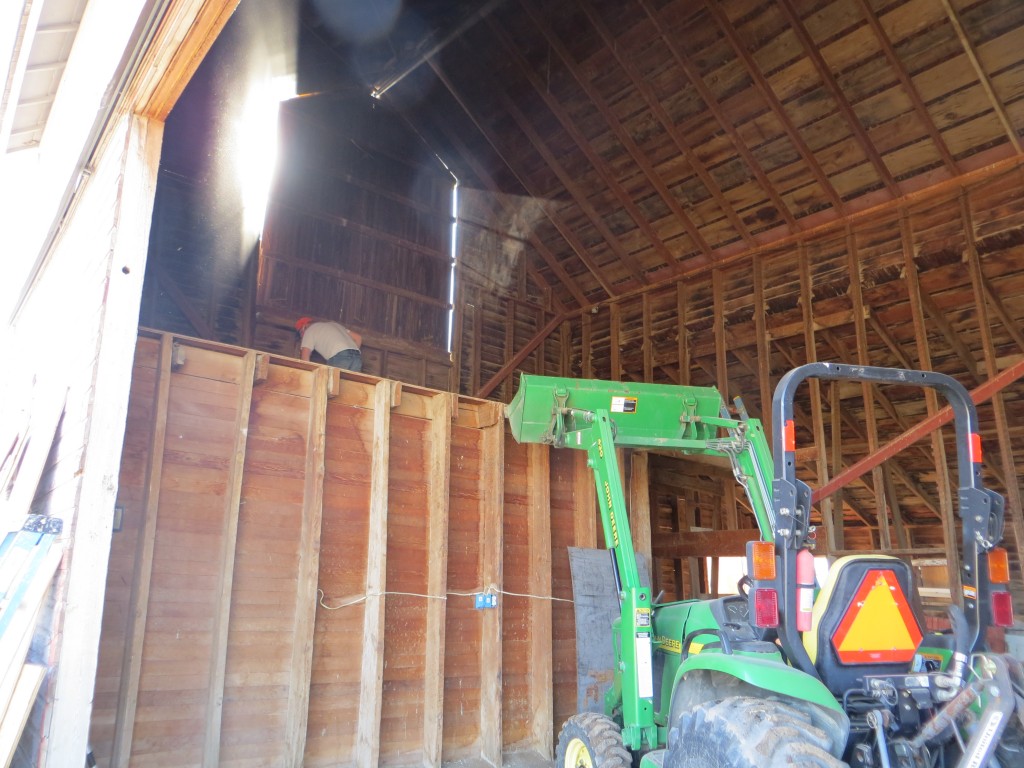
We did go up in the hay loft (that’s where the ginormous pile of bat guano was).  It was pretty cool up there.  Hubby wants to have a barn party and have a band play from up there.  After seeing all the bat shit up there, I have visions of bats flying out at the band in a nightmarish wave and really ruining the whole party.

Hay loft and the green beast.

We did get the cables installed and the barn is safe(r) than it was.  We slept a little better last night knowing that we were *less likely* to wake up to a collapsed barn and I was very thankful today when the wind picked up!

Cables all hooked up!

Posted in Uncategorized | 2 Comments